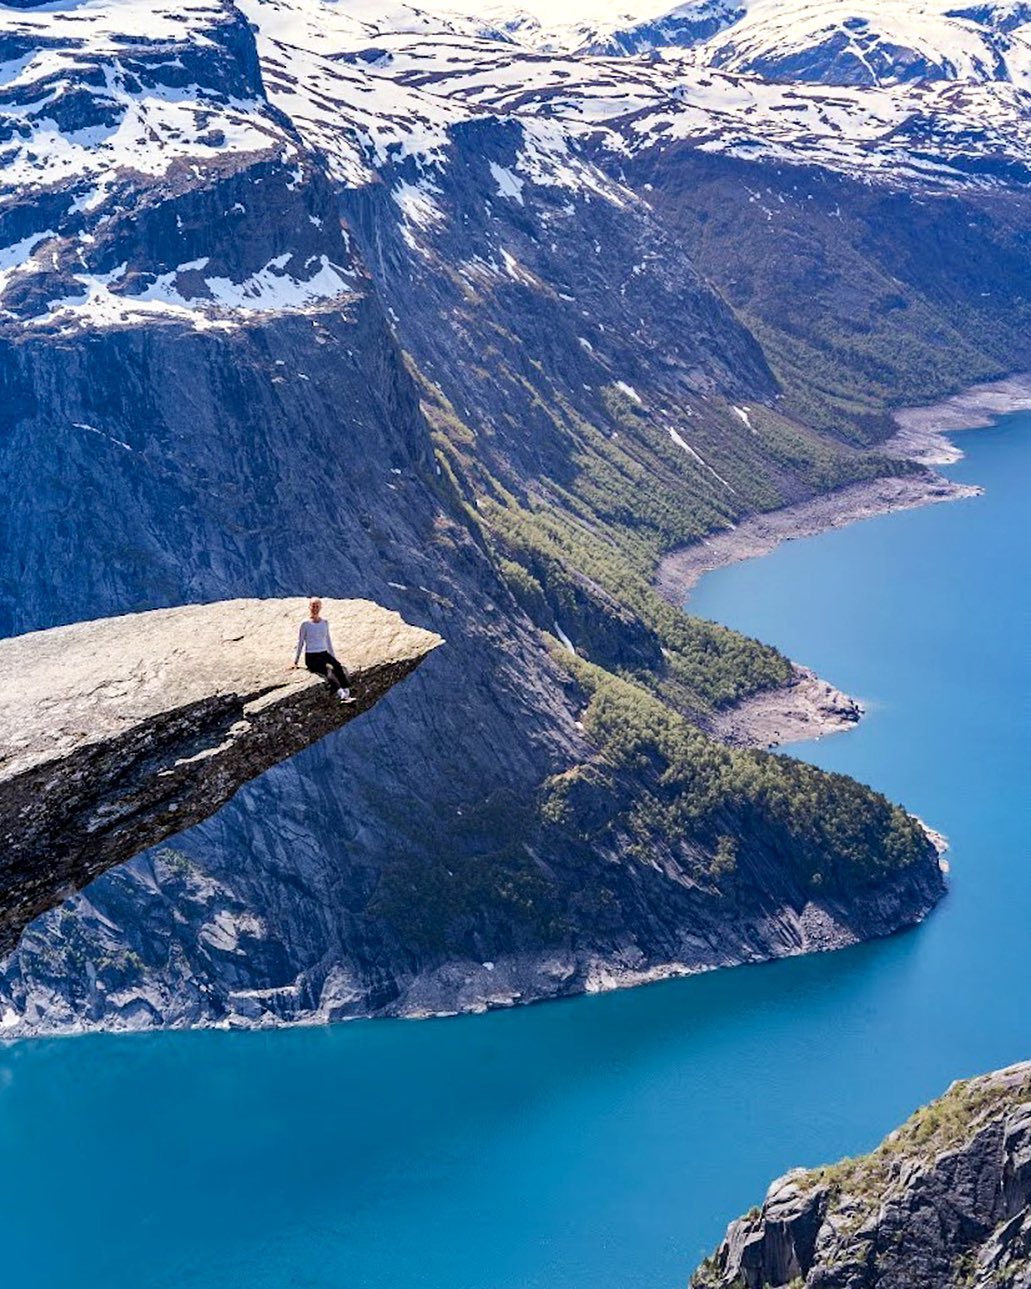
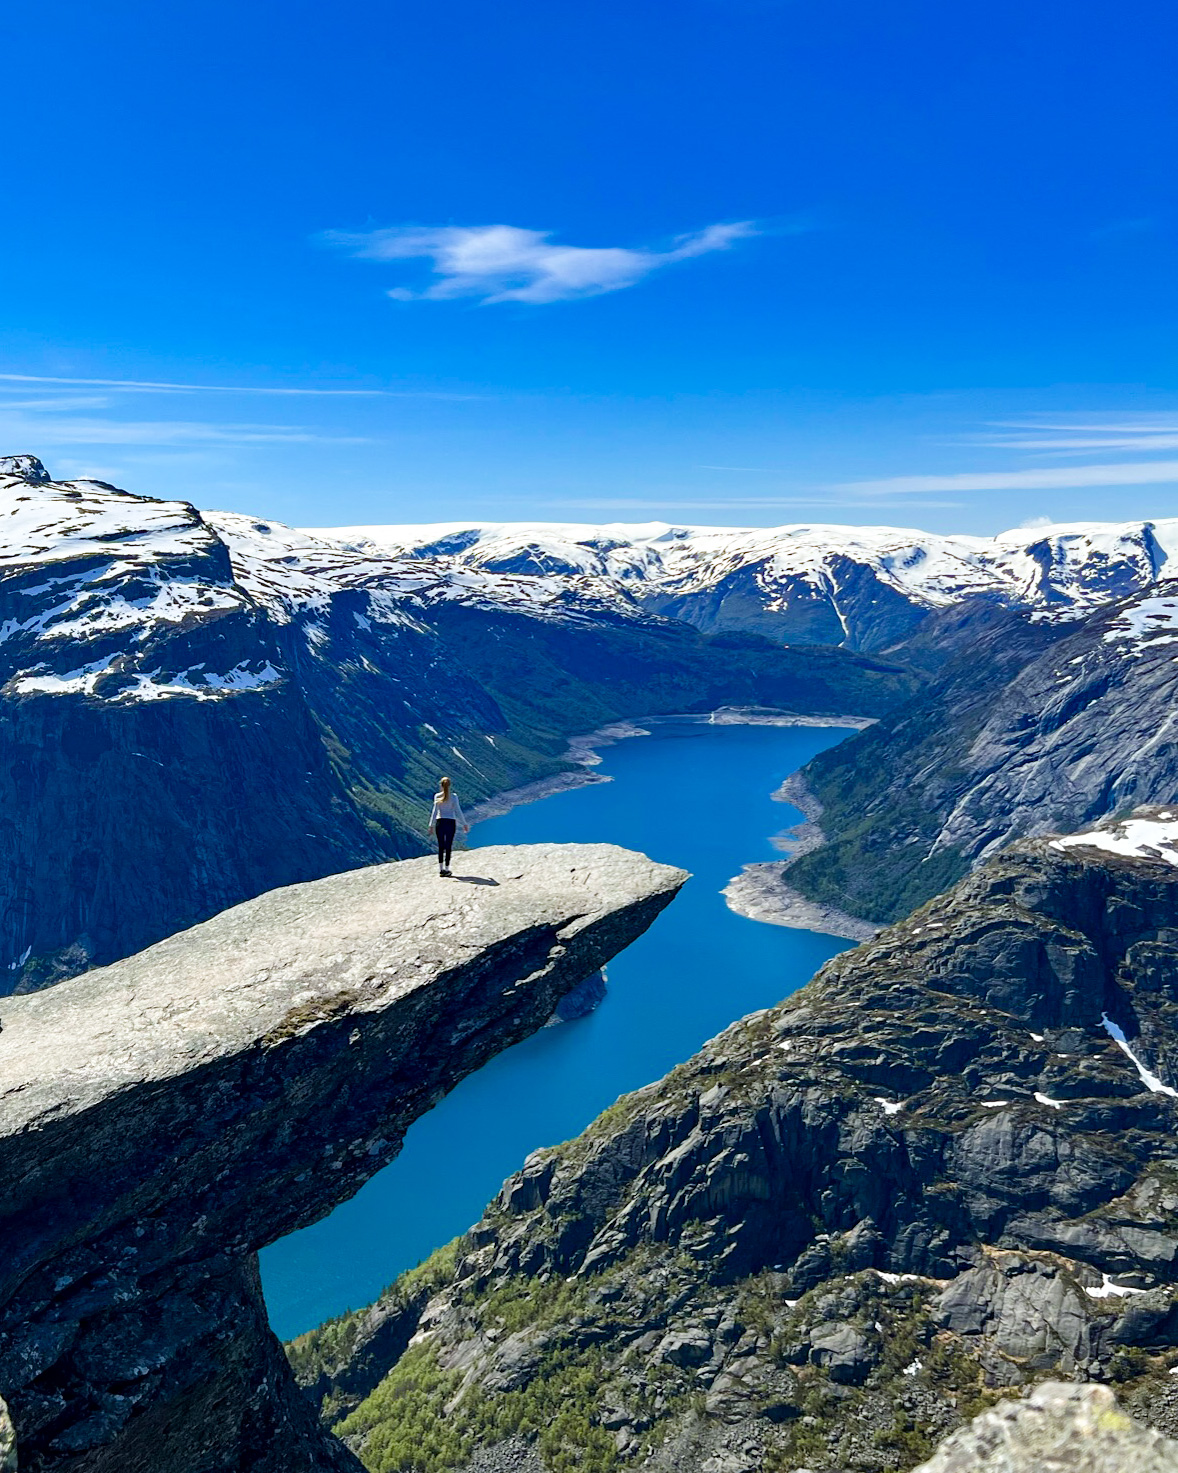
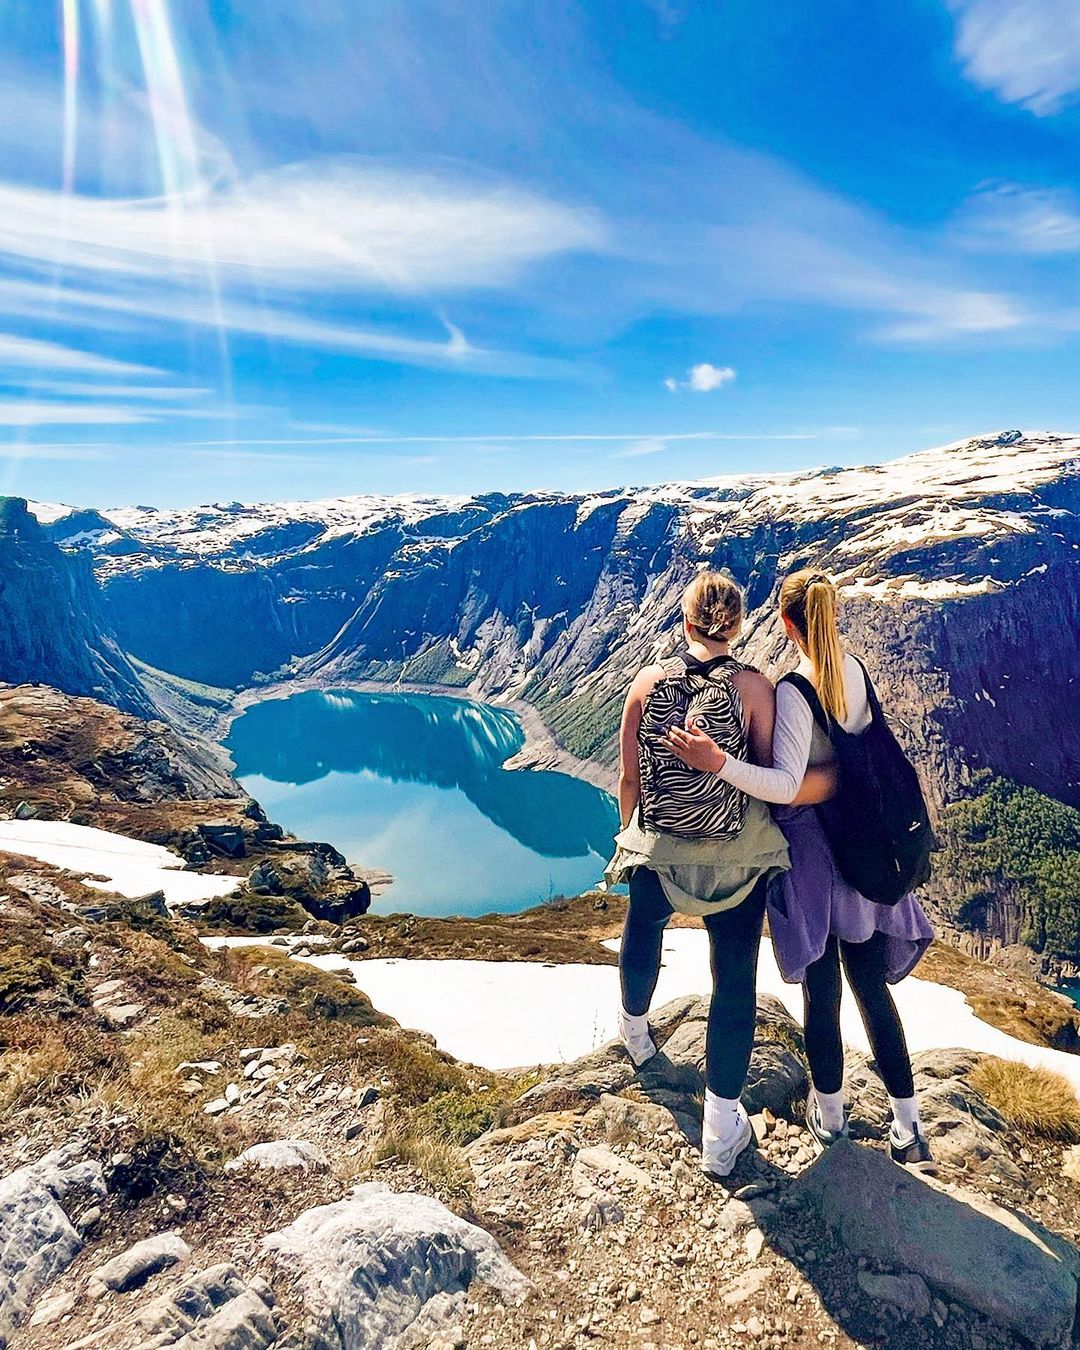
So you want to conquer Trolltunga? Famous across Instagram, the internet and anyone who has done a bit of research into Norway, Trolltunga is a spectacular rock cliff, situated within rural Norway. Jutting out some 700m above Lake Ringedalsvatnet (and sitting at 1100m above sea level), tackling the Trolltunga hike and sitting out on the rock is on the bucket list for so many travellers – and for good reason. Read on to discover everything you need to know about how to conquer Trolltunga – the ultimate Norway hike.
Please note: for up to date and reliable information before starting the Trolltunga hike see the Trolltunga official website and the Visit Norway official website.
Where is Trolltunga?
First things first, Trolltunga is found in rural Norway. Located a 6 hour drive from Oslo (Google Maps directions here) and a 3.5 hour drive from Bergen (Google Maps directions here). As a result, depending on what else you want to see in Norway, a lot of travellers will arrive in Norway at either Oslo or Bergen and travel to Trolltunga from here. The closest town to Trolltunga is Odda – about a 20 minute drive from the Trolltunga car park (Google Maps directions here).
Where to stay for Trolltunga?
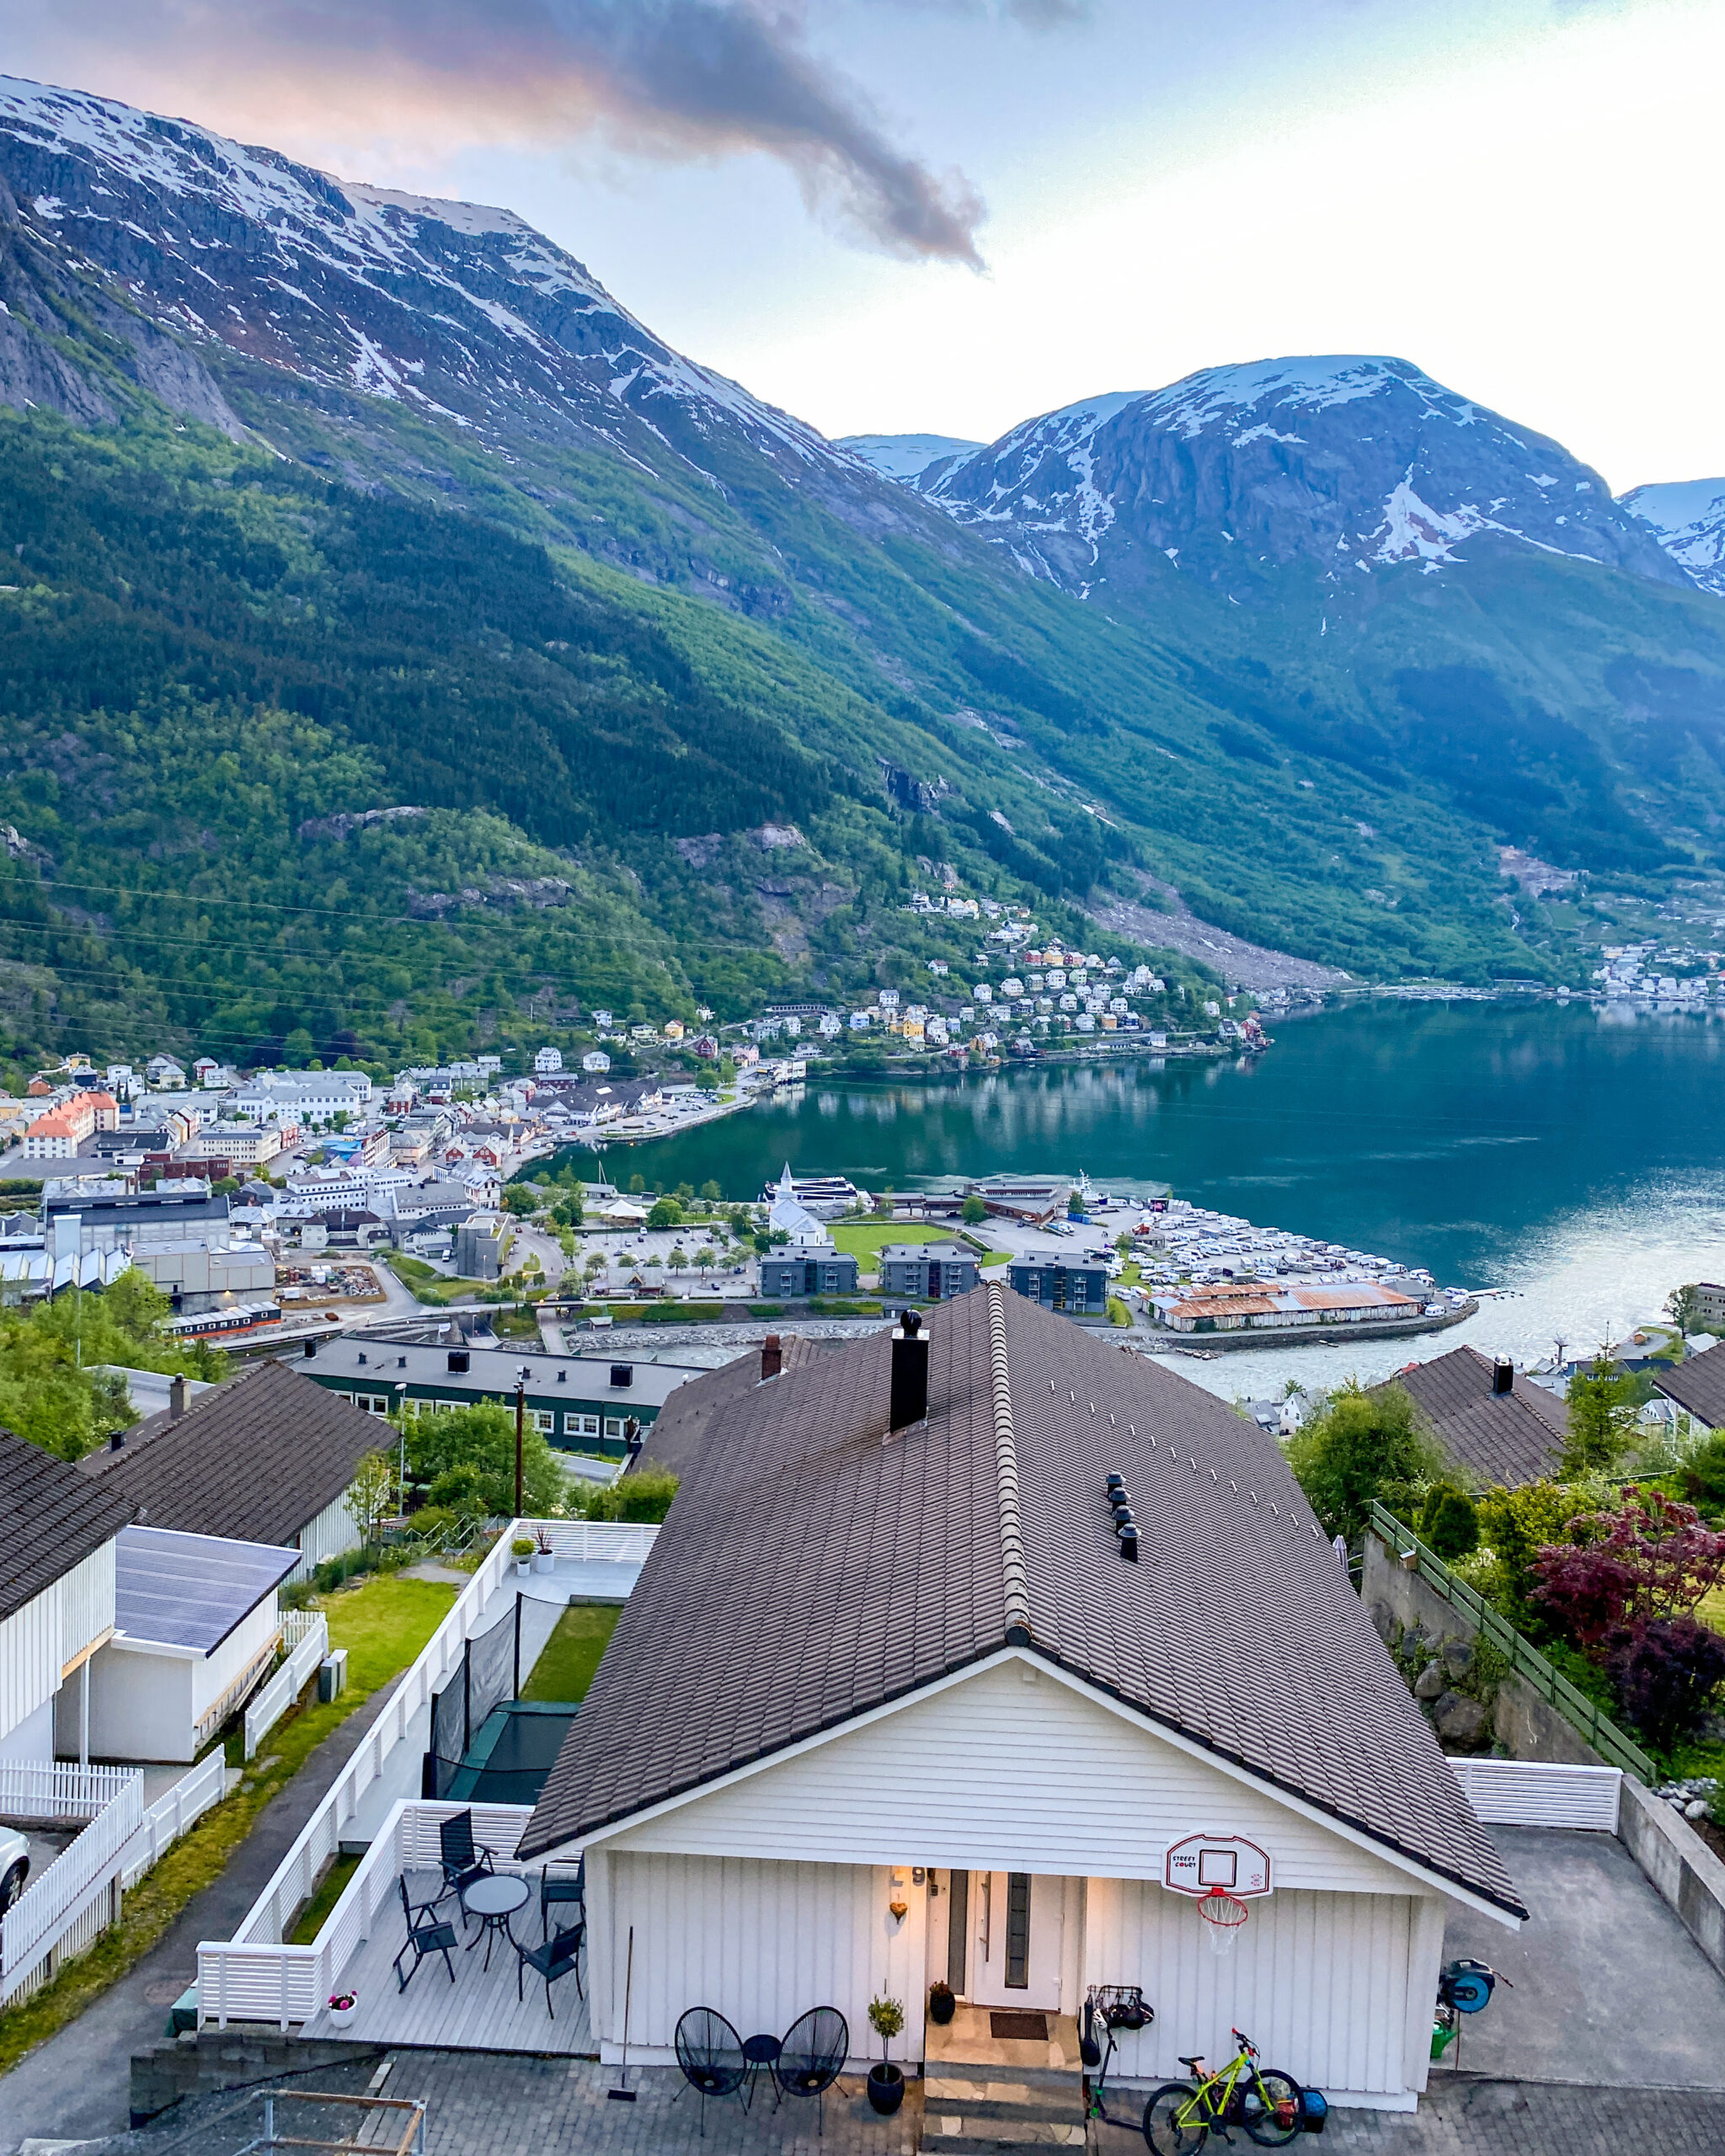
A lot of people visiting Trolltunga stay at Odda, the small town at the base of the mountain (Google Maps location here). Due to the popularity of Trolltunga it’s important to book early in this town as accommodation will sell out. We stayed at an Airbnb in Odda for two nights during our time here. If you miss out on booking in Odda there are other towns further out, but ideally Odda is a great base (it’s also a very beautiful town).
What do I need to bring?
When packing for Trolltunga be sure to include the following
- Hiking boots – ideally waterproof, especially if there is still snow.
- Jumper/Jacket – while we hiked Trolltunga on quite a hot day (yes, it was hot even though there was snow!) and didn’t need jackets while hiking, when we got to the top it was a bit cool so the jacket was welcomed.
- Lunch and snacks – the more the merrier – there is no where to get food on the mountain.
- Water – at least two bottles.
- Camera – with a spare SD card and battery if needed.
- Hat
- Sunscreen
- Sunglasses
- Moisturiser – even with the best of intentions, if you’re hiking in snow it’s likely you’ll still get a bit red. Unfortunately the petrol station in Odda doesn’t sell moisturiser so be sure to bring some of your own with you.
How to get to Trolltunga?
You have a few options to get to Trolltunga from the surrounding town.
Car
There are three car parks at Trolltunga (more on this below) meaning you can drive your car up to the start of the Trolltunga hike. It is easy to find, well sign posted and the car park’s official names are recognised on Google Maps). Norway is expensive and Trolltunga is no exception. When we visited one day parking at the second car park was 500 NOK a car (£42 / $75AUD). Very expensive but if you have a big group of people with you it’s likely to work out to be cheaper and easier than the other options. You can find up to date Trolltunga car parking prices here and there is more information on the different car park options below.
Taxi
Taxis from Odda to the Trolltunga car parks (start of the hike) are also an option. Taxi’s typically charge 600 NOK for 4 people one way (£50 / $88AUD) with 150 NOK for each additional person (£12.50 / $22AUD). You can find out more about booking at taxi to Trolltunga here.
Bus
There is a public bus that will take you from Odda to Trolltunga car park 2 for 300 NOK return per person (£25 / $44AUD). You can find out more about the buses, prices and timetables here.
Parking at Trolltunga
As mentioned earlier, driving and parking at Trolltunga can be the most convenient option if you have a car – and if you’re travelling with a group, it is likely to be the most cost effective way as well. Now onto the parking. There are three car park options at Trolltunga – Car Park 1 (P1 Tyssedal), Car Park 2 (P2 Skjeggedal) and Car Park 3 (P3 Mågelitopp). Car Park 1 is the lowest point and Car Park 3 is more or less where the hike properly starts.
Car Park 3 can only be pre-booked and there is only 30 spaces available. Booking for Car Park 3 opens in March, so if you have planned your trip ahead of time, be sure to book your Trolltunga car park spot early to nab the best place. You can book this here.
When we visited Trolltunga, we weren’t aware of the car parking situation until a few days before so Car Park 3 had already been booked out. For the other two car parks (P1 and P2) you don’t need to pre-book these. P1 has 220 spaces, and cost 300 NOK a car for the day (£25 / $44AUD). P2 has 180 spaces and cost 500 NOK a car for the day (£42 / $75AUD). When we arrived at about 740am the day of our hike, most places in P2 had already been filled (we visited on a Saturday in good weather) so the earlier you arrive, the better. We still got a car park at P2 but just something to keep in mind. You can find out more about the Trolltunga car park options and up-to-date pricing and information here.
Bus options to get up Trolltunga from the car park
A bus to get up Trolltunga? Tell ’em he’s dreaming. While there is not a bus that will take you to the top of Trolltunga, there is a bus that will cut out the gruelling and boring first part of the Trolltunga track if you aren’t one of the lucky ones to nab a P3 car parking space. We booked the bus to get us from P2 (where we parked) to P3 and it was a really good decision.
The Trolltunga P2 to P3 bus only operates in the summer season, and more frequently on certain days. You can see the online timetable here. You can pre-book this Trolltunga bus online for the P2 to P3 section of the journey (pre-booking is available until midnight the day before your Trolltunga hike and they don’t take pre-bookings for the return bus journey at the end of the day) and I would encourage you to pre-book your first bus journey – meaning you’ll have a spot on the bus and won’t need to wait on stand by. The bus from P2 to P3 (to start the hike) is 130 NOK (£11 / $19AUD) per person. Keep your ticket on you, the bus from P3 to P2 (at the end of the hike) is discounted to 100 NOK (£8.50 / $14.50AUD) when you show your morning ticket. Also keep an eye on the time while on the Trolltunga hike as the bus from P3 back to P2 does not operate all evening so be sure to factor that in. You can find out more about the Trolltunga P2 to P3 (and return) here.

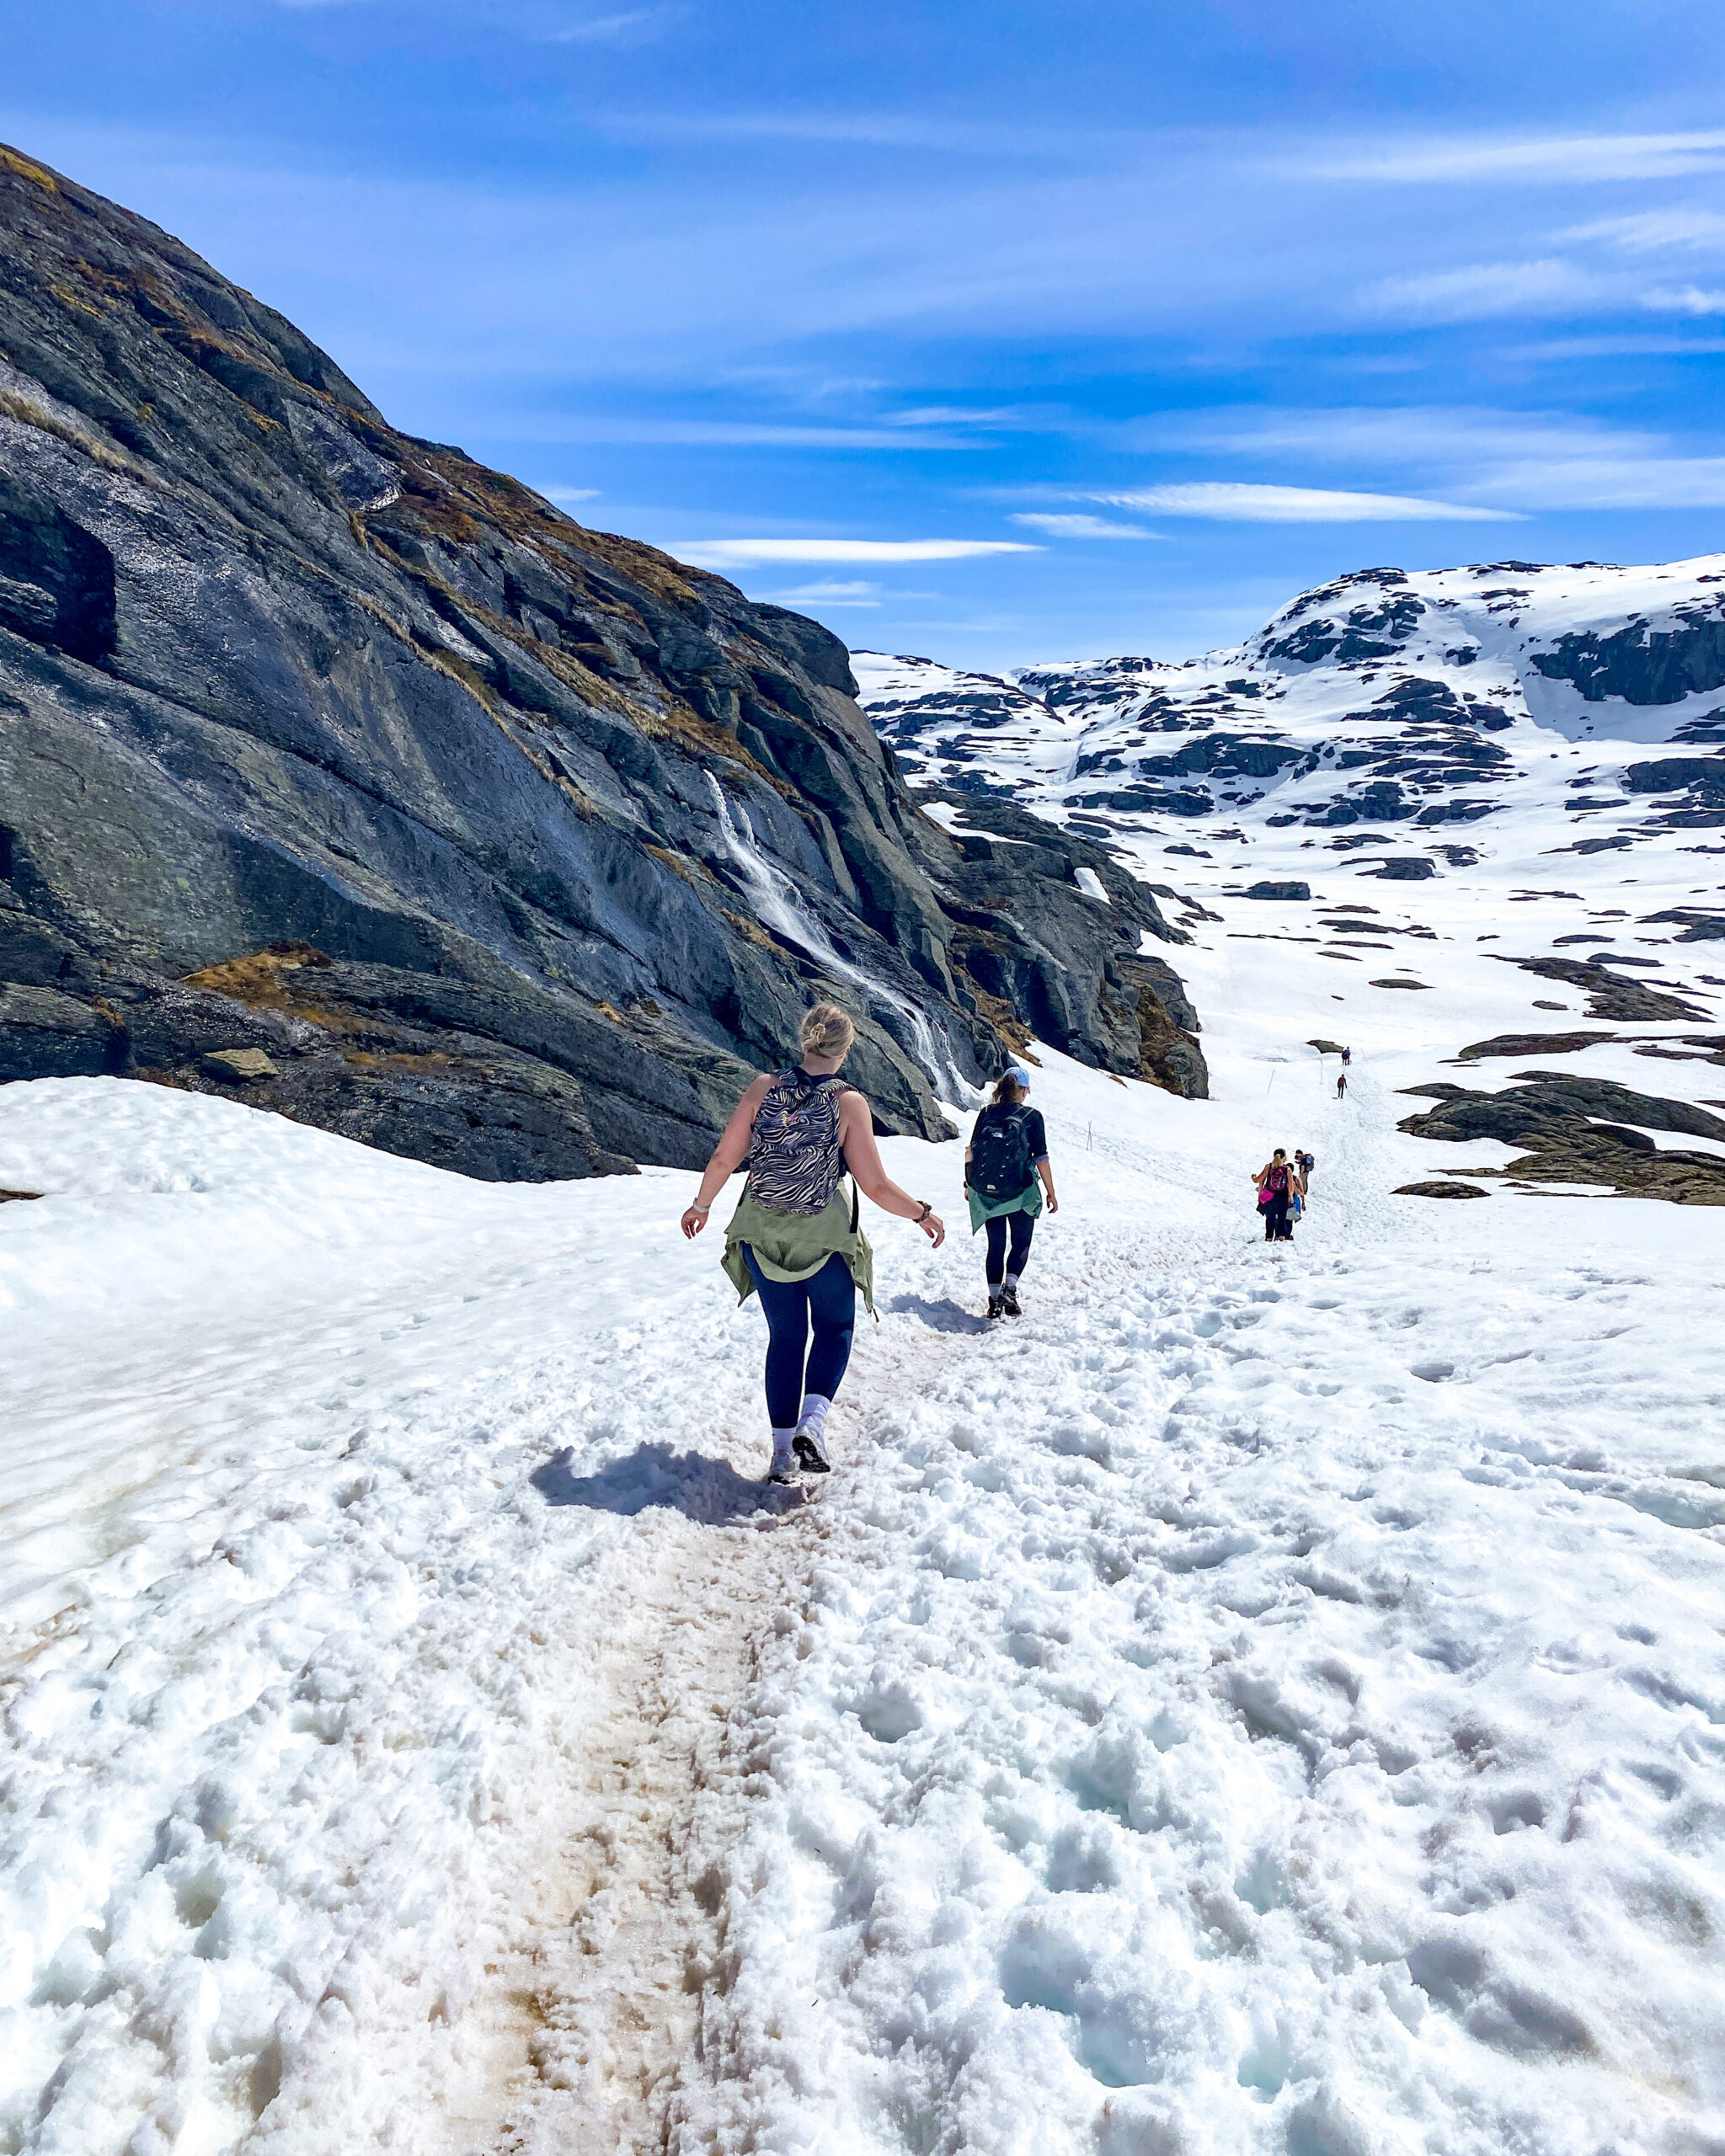
What is the Trolltunga hike like?
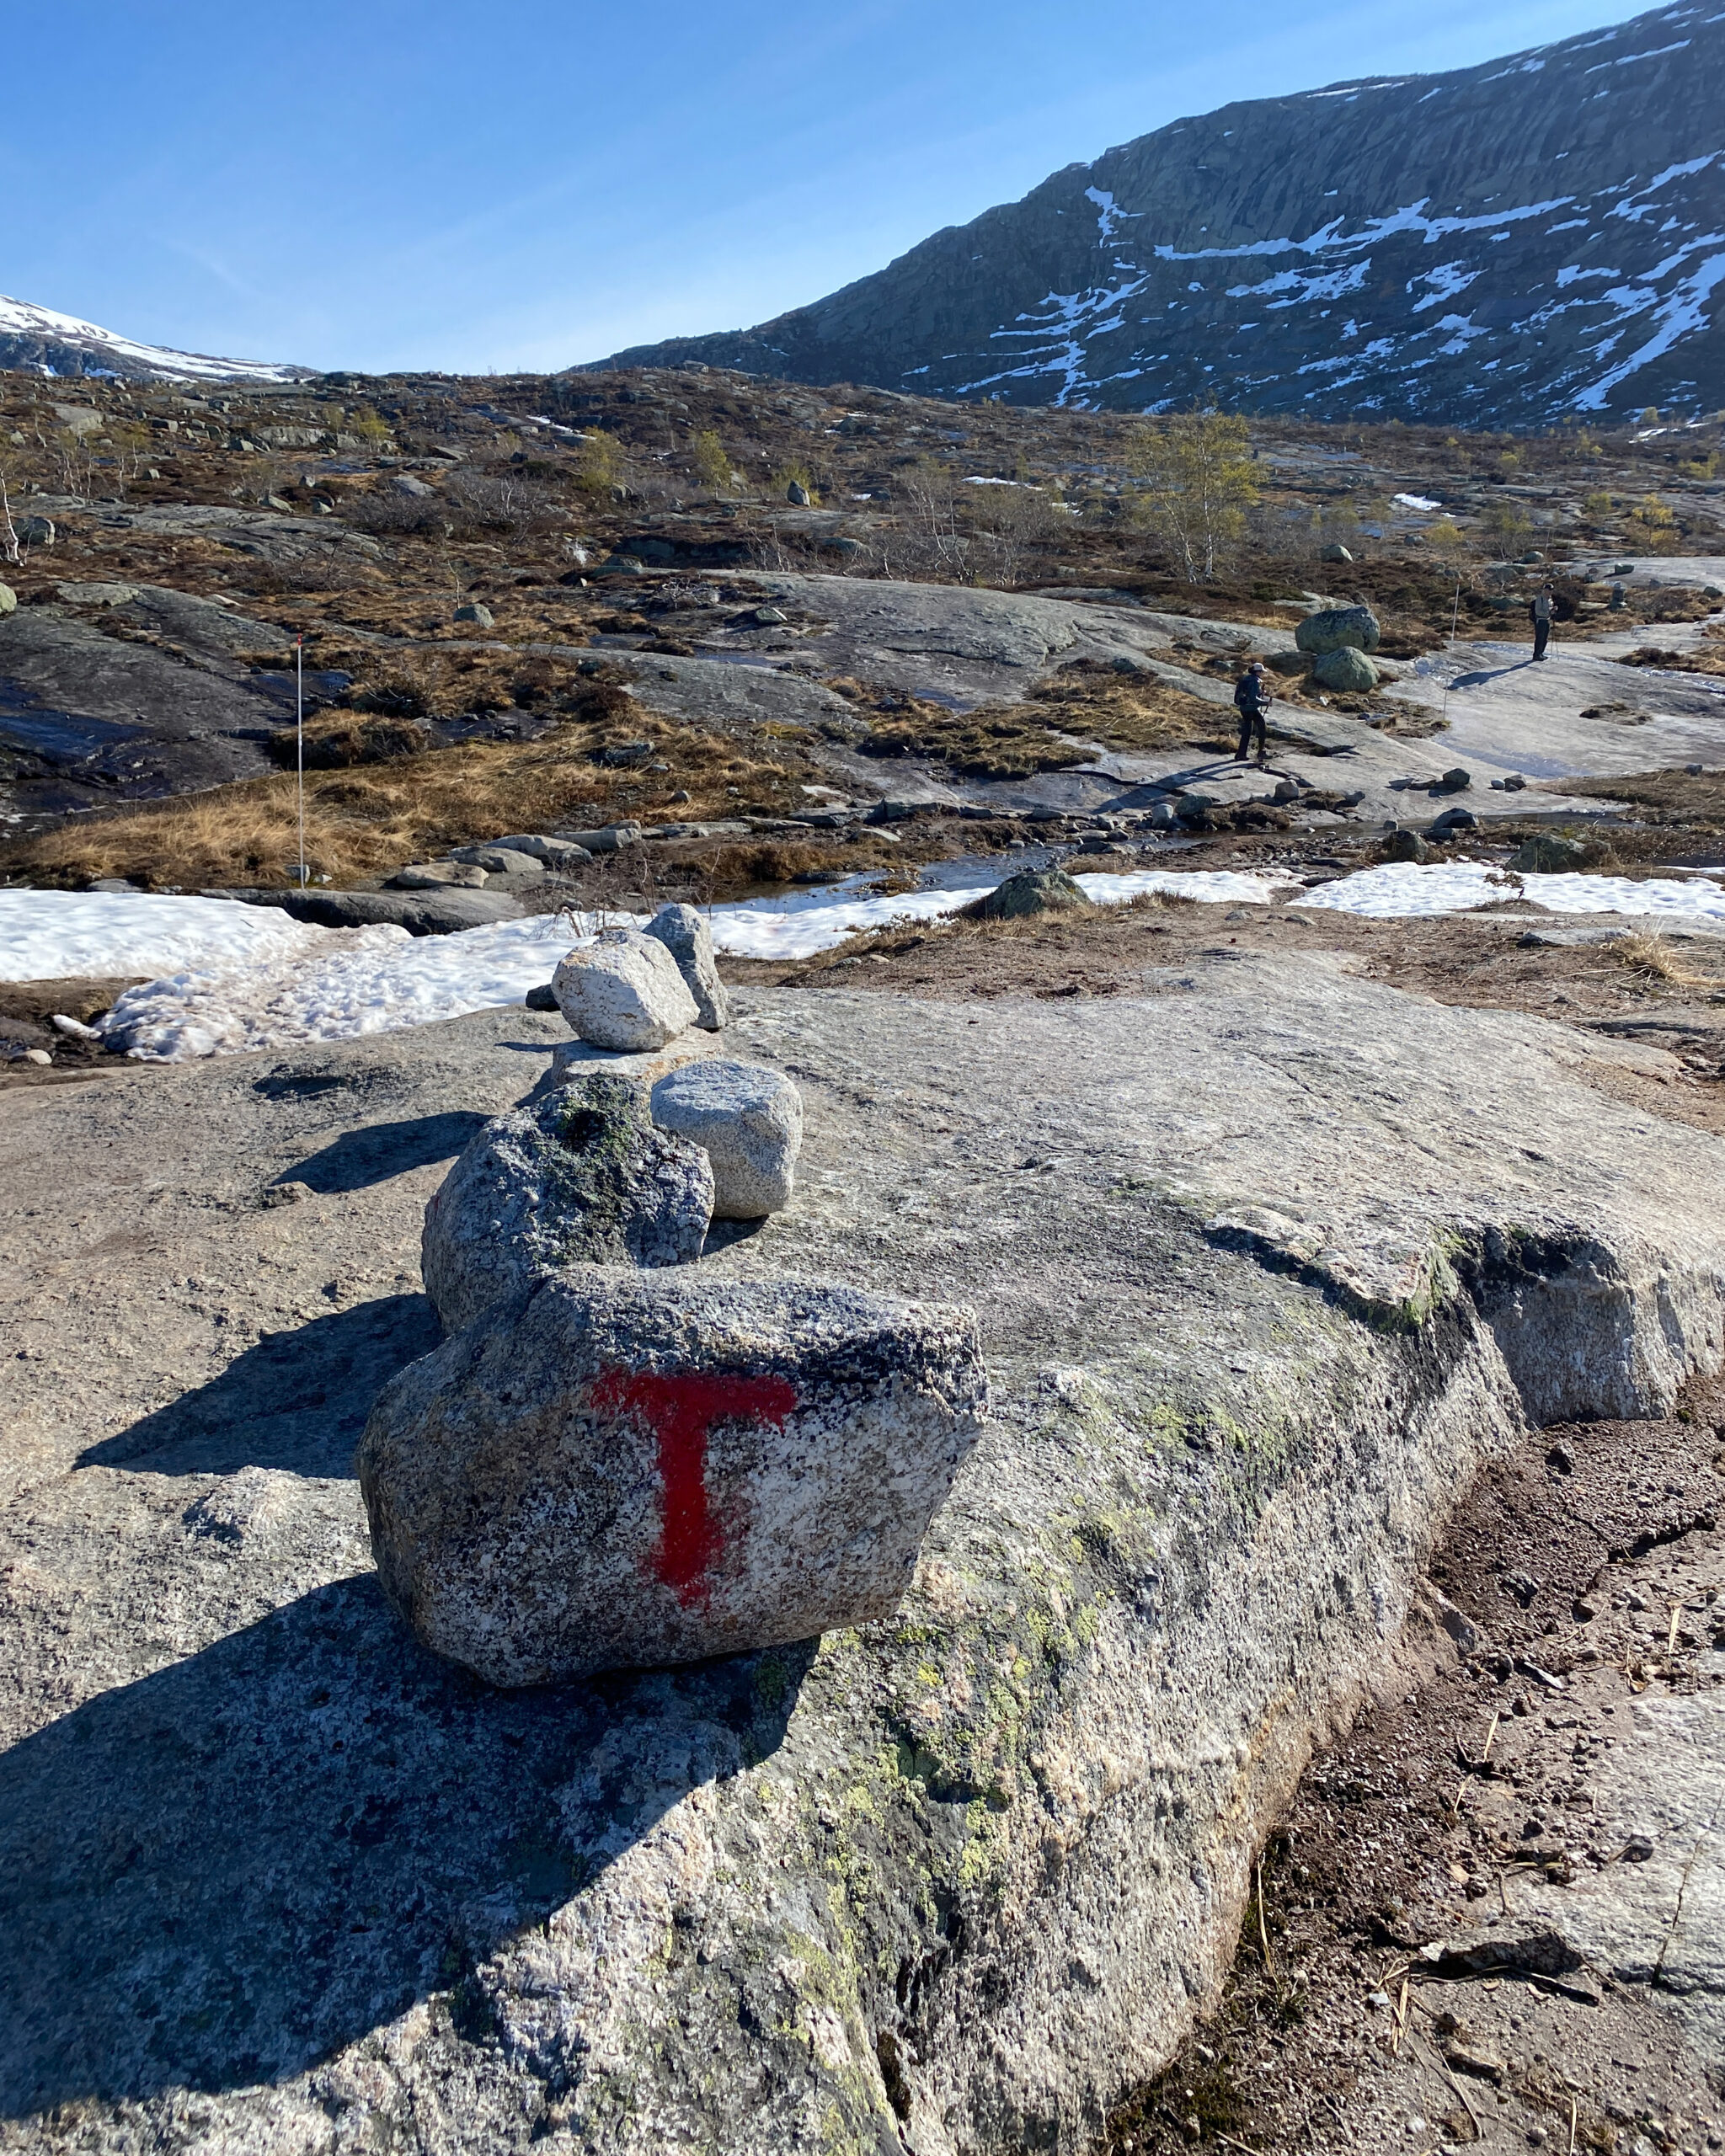
If you take the bus up to P3 and the main starting point of the hike, overall the Trolltunga hike is not difficult. It is clear where to follow the track as it is marked with signs and red “T” to show where to go.

The first part is flat before reaching rocky stairs. The stairs were the only part for me that I found difficult as I had been recovering from the flu and my lungs were not 100%.

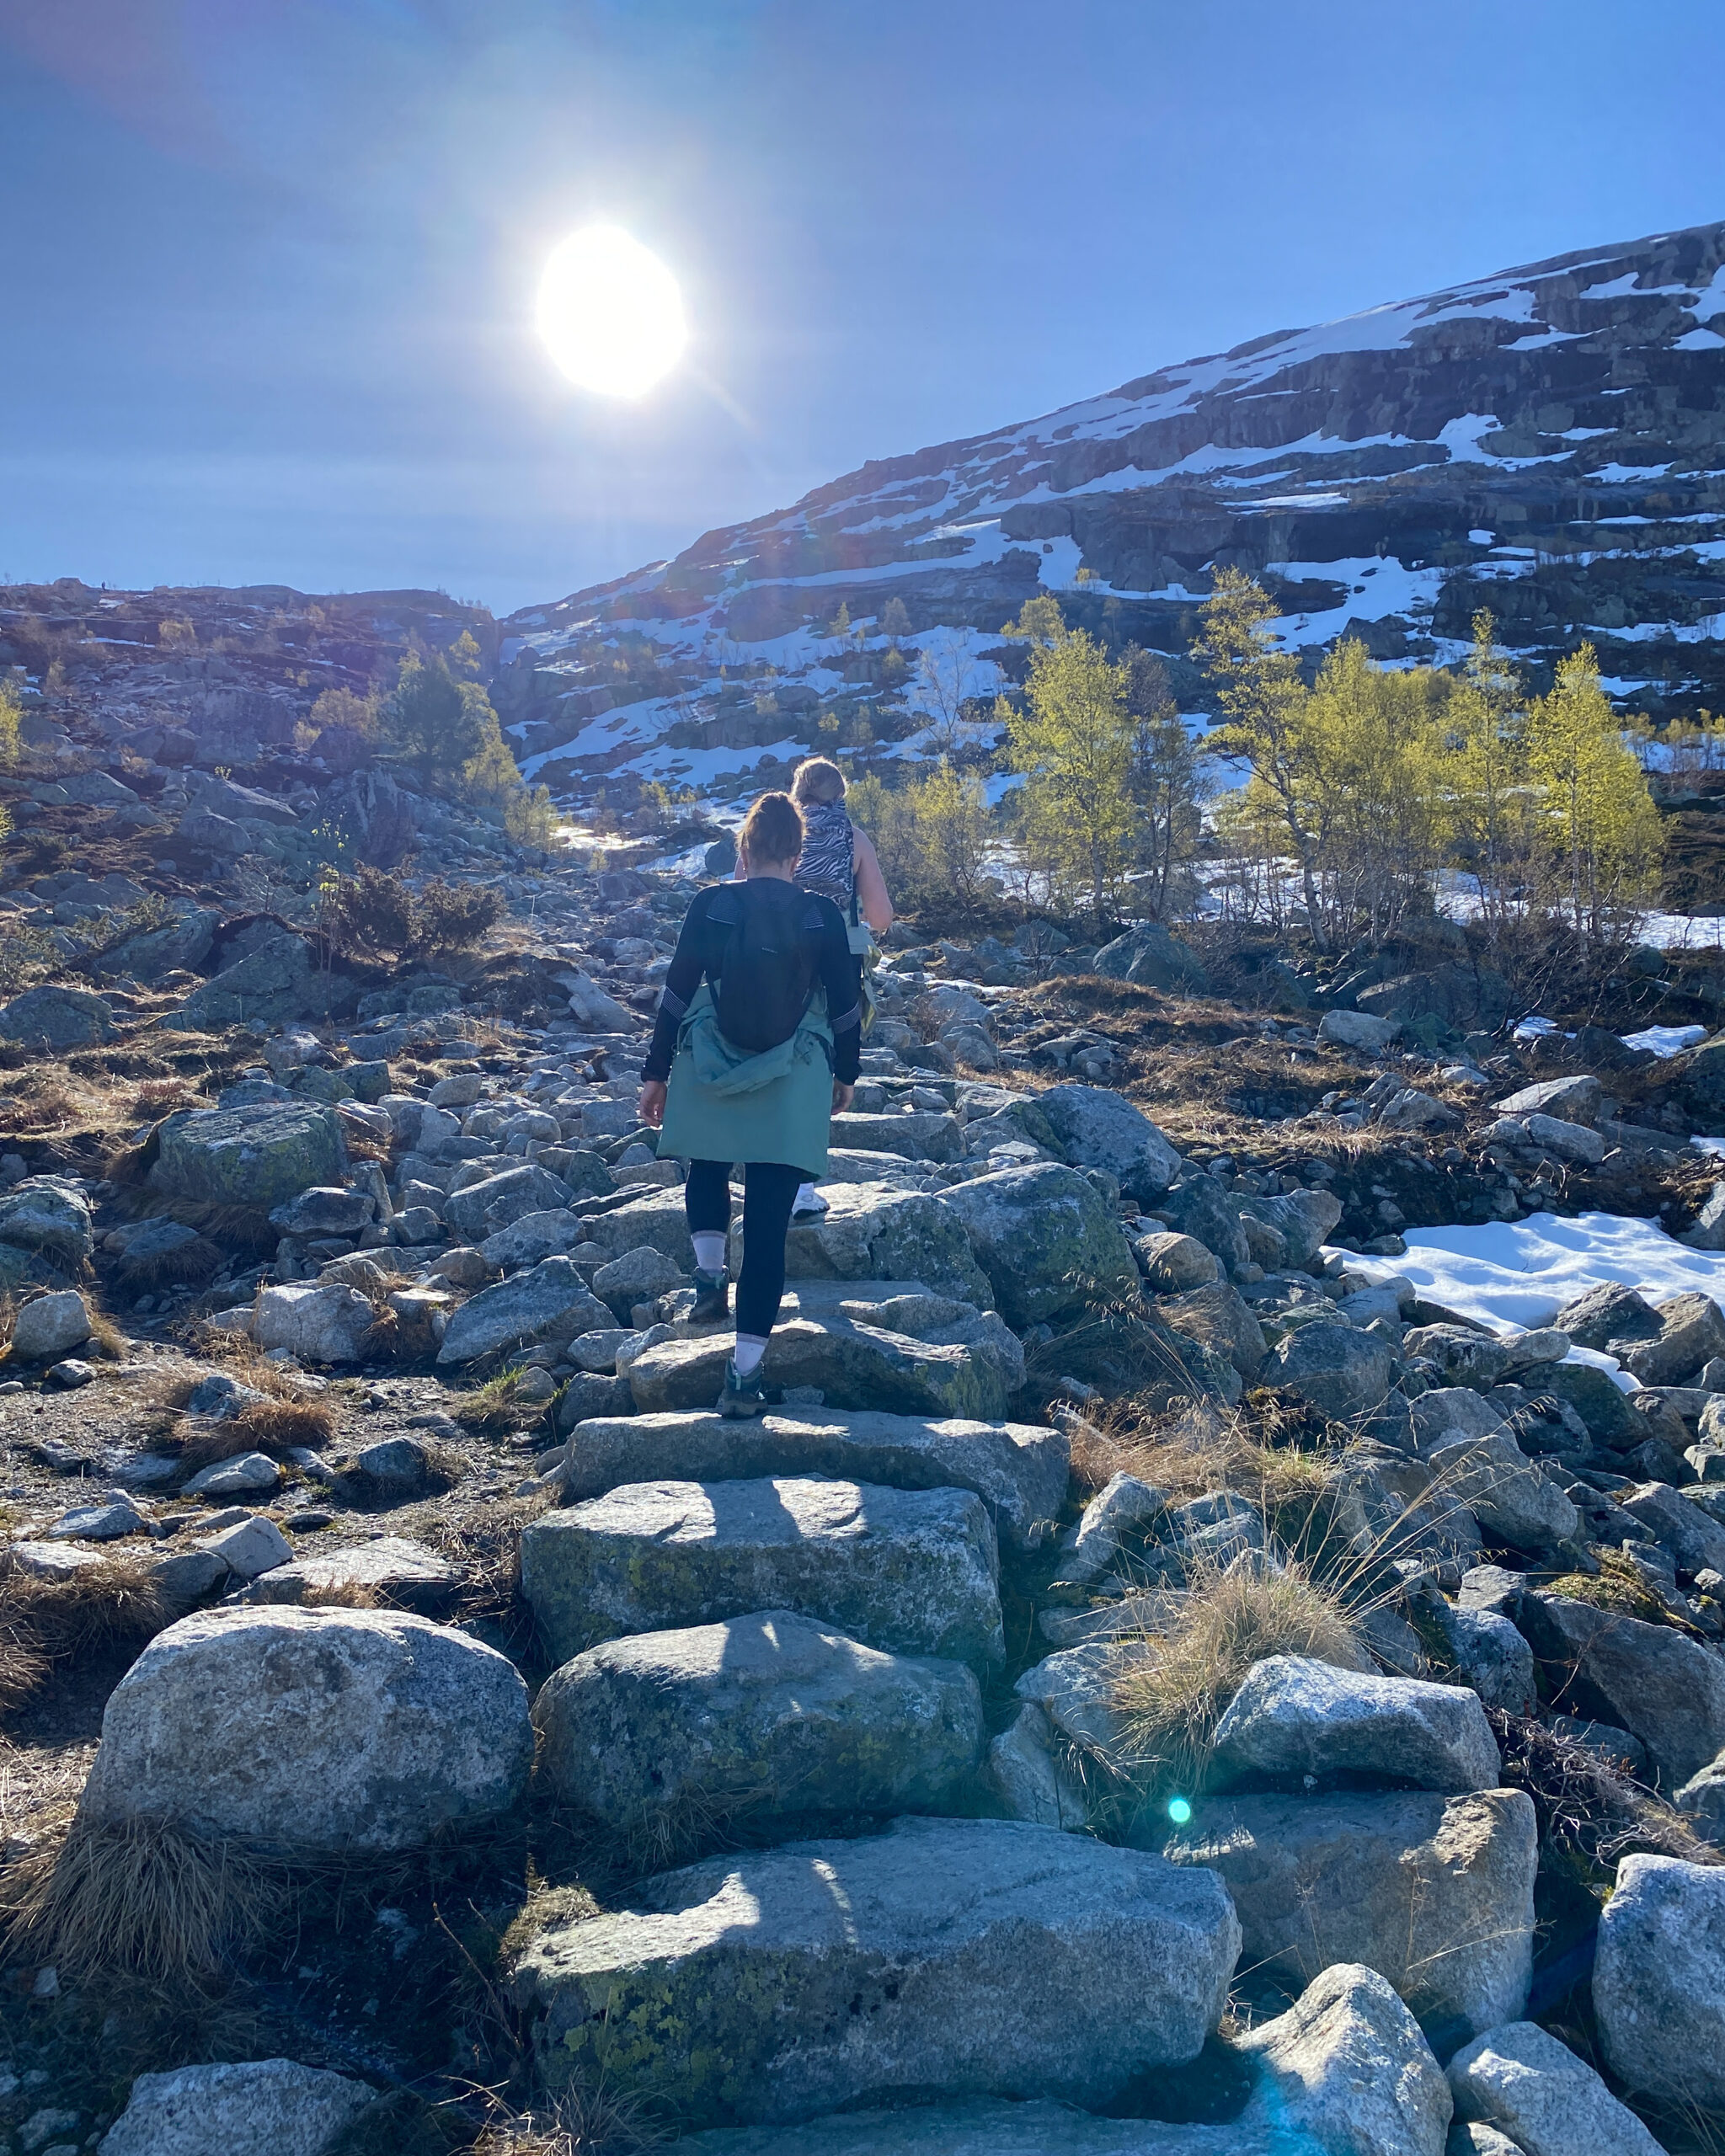
However, once you pass this section of the Trolltunga trail the majority of your walk is flat (with a few inclines along the way)- it’s just a long walk. There are lots of spots along the way to pull out your sandwiches and eat.
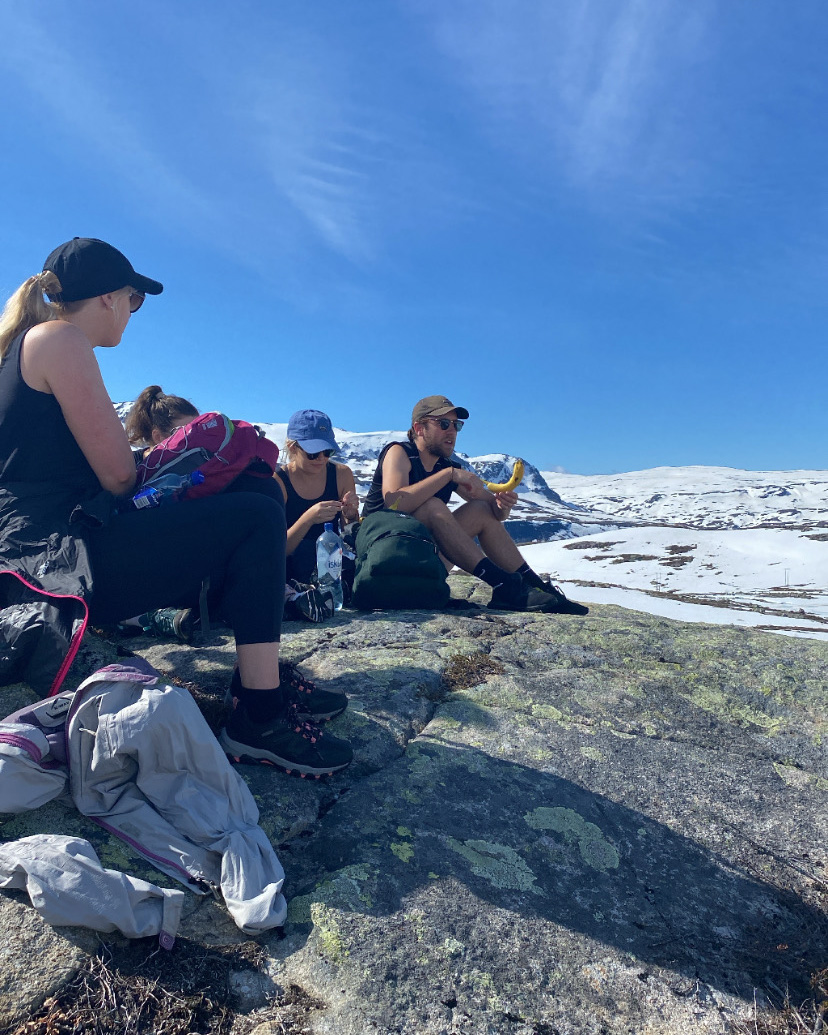
About half way or so up there is an impressive view of one of the lake’s below, which is a great spot to stop, eat some food and enjoy the view.
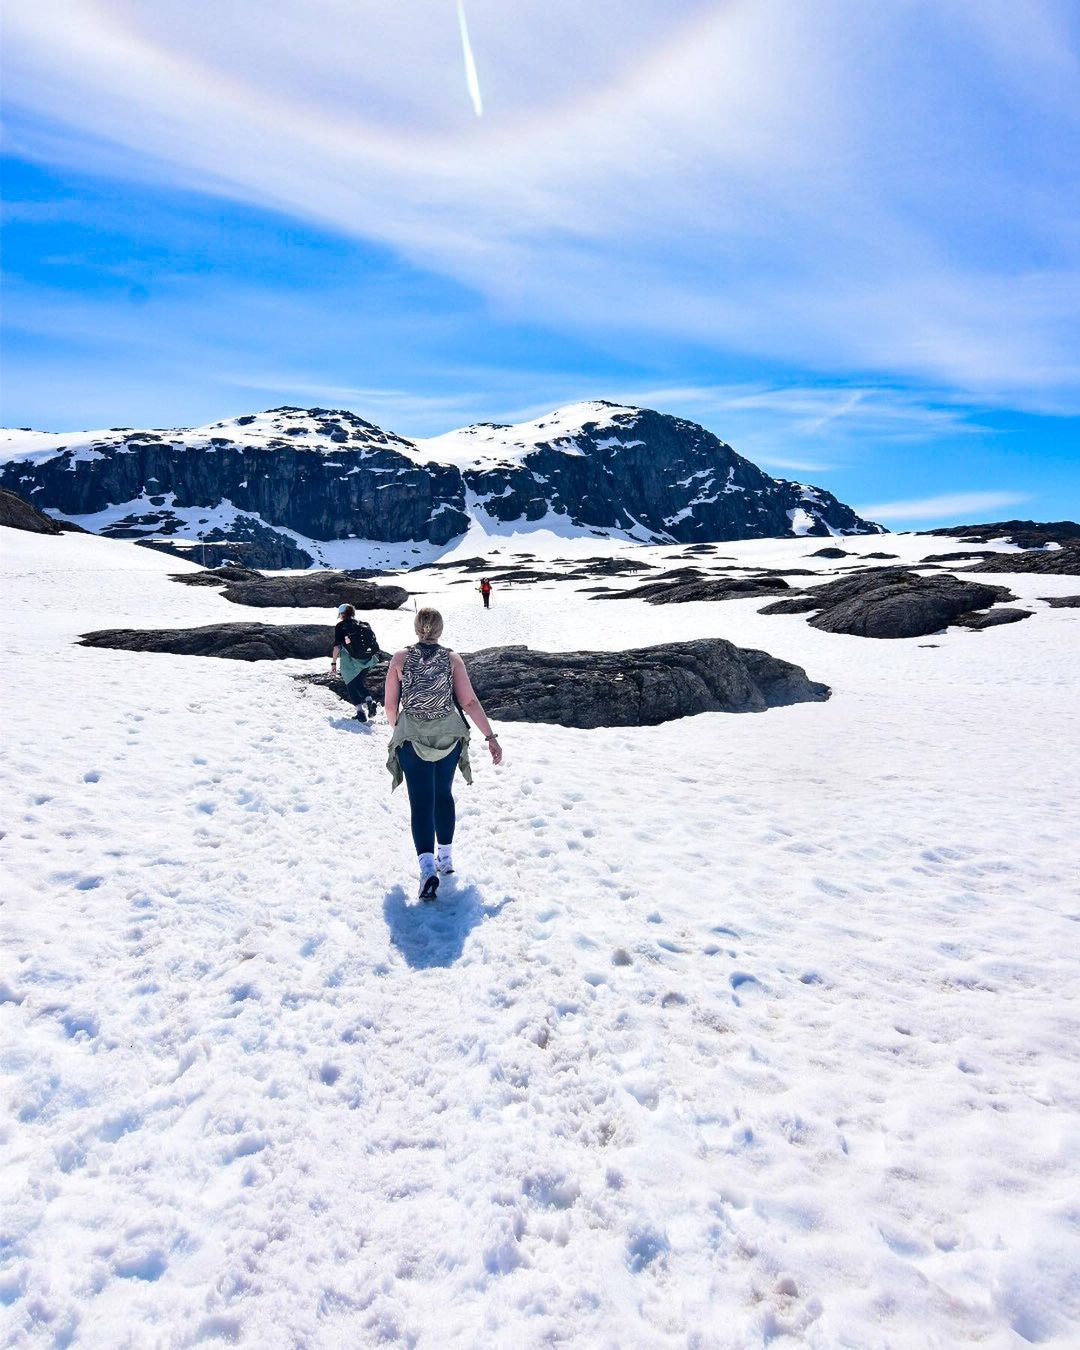
When we visited in early June, most of the track was snow – we were told it was still about 90% snow on the hike. However, all this did was slow us down (harder to walk on snow) than hinder us too much. There was one section on the way back that took a bit of concentration but overall was fine.
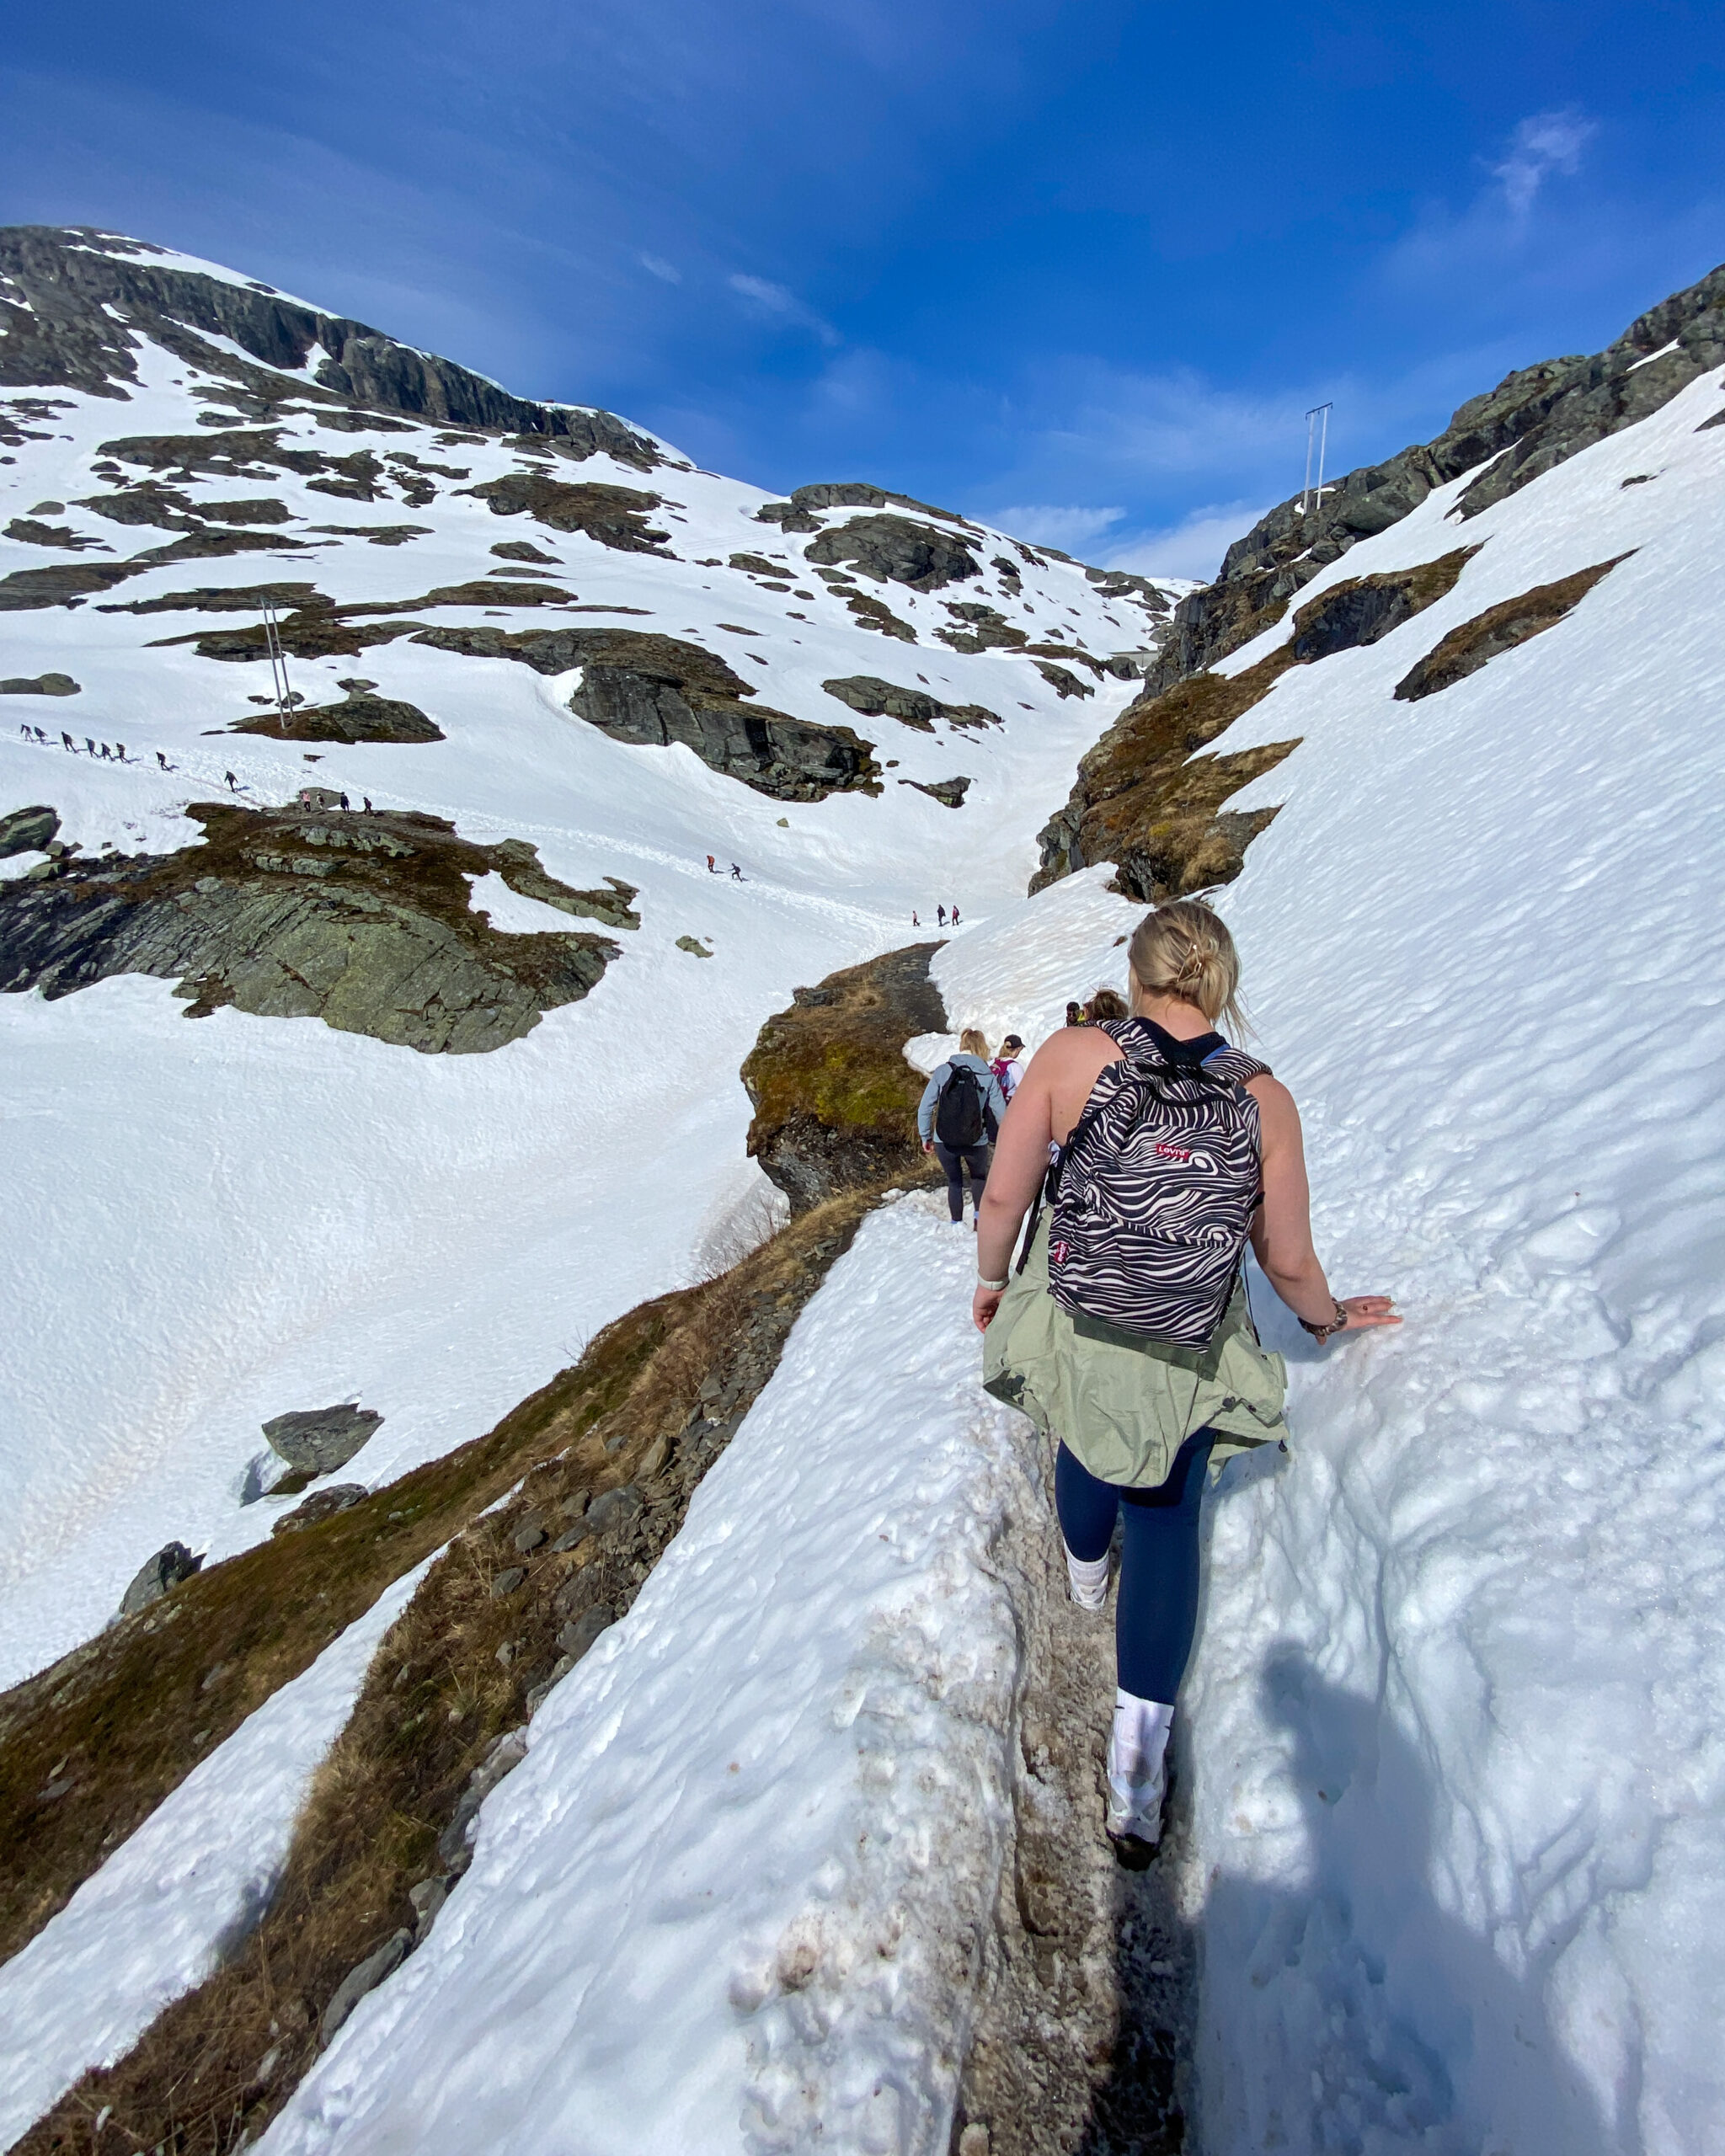
We also had very good weather to match the snow and if you are unsure please check in with a guide company to ask them what they think and please always, always check the conditions and weather before commencing a hike. I’m only expressing my experience hiking Trolltunga rather than giving specific advice as I can’t comment on other situations/people. I am also not a beginner hiker – if you are a beginner hiker you may find the Trolltunga track a bit harder, but overall from my experience I would not personally classify this hike as overly strenuous.
How long did the Trolltunga hike take?
From the P3 starting point to the Trolltunga rock, it took us 4 hours to hike up and 2 hours and 45 minutes to hike down. The snow slowed us down on the walk up and we were motivated to walk quicker on the way down to catch the last bus from P3 to P2. I believe without snow, we would’ve done the Trolltunga hike a bit quicker. Including photo time at the top (more on this later) we started our Trolltunga hike just after 8am and finished just before 6pm.

When should we go to Trolltunga?
The Trolltunga hiking season goes from the 1st of June to the 31st of August each year. Hiking Trolltunga outside of these times requires a guide as winter opens you up to a lot more of the elements and conditions. Over winter, Trolltunga can completely ice over meaning that you cannot go out onto the rock.
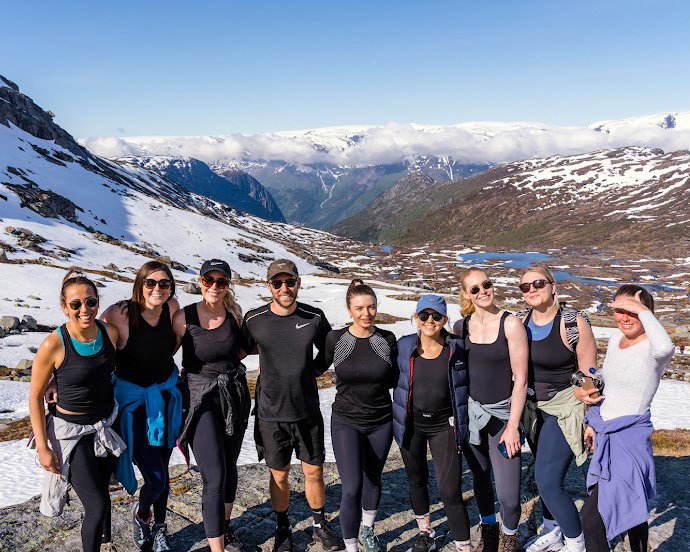
We visited Trolltunga a few days after it first opened for the year on Saturday the 4 June for my friend’s birthday. It was a very clear day and as a result, it was very busy. I would recommend visiting Trolltunga on a weekday where possible, and towards the end of the season if you can. Although we were there right at the start of the season, it was very popular and I can imagine that it only gets busier as the summer continues.

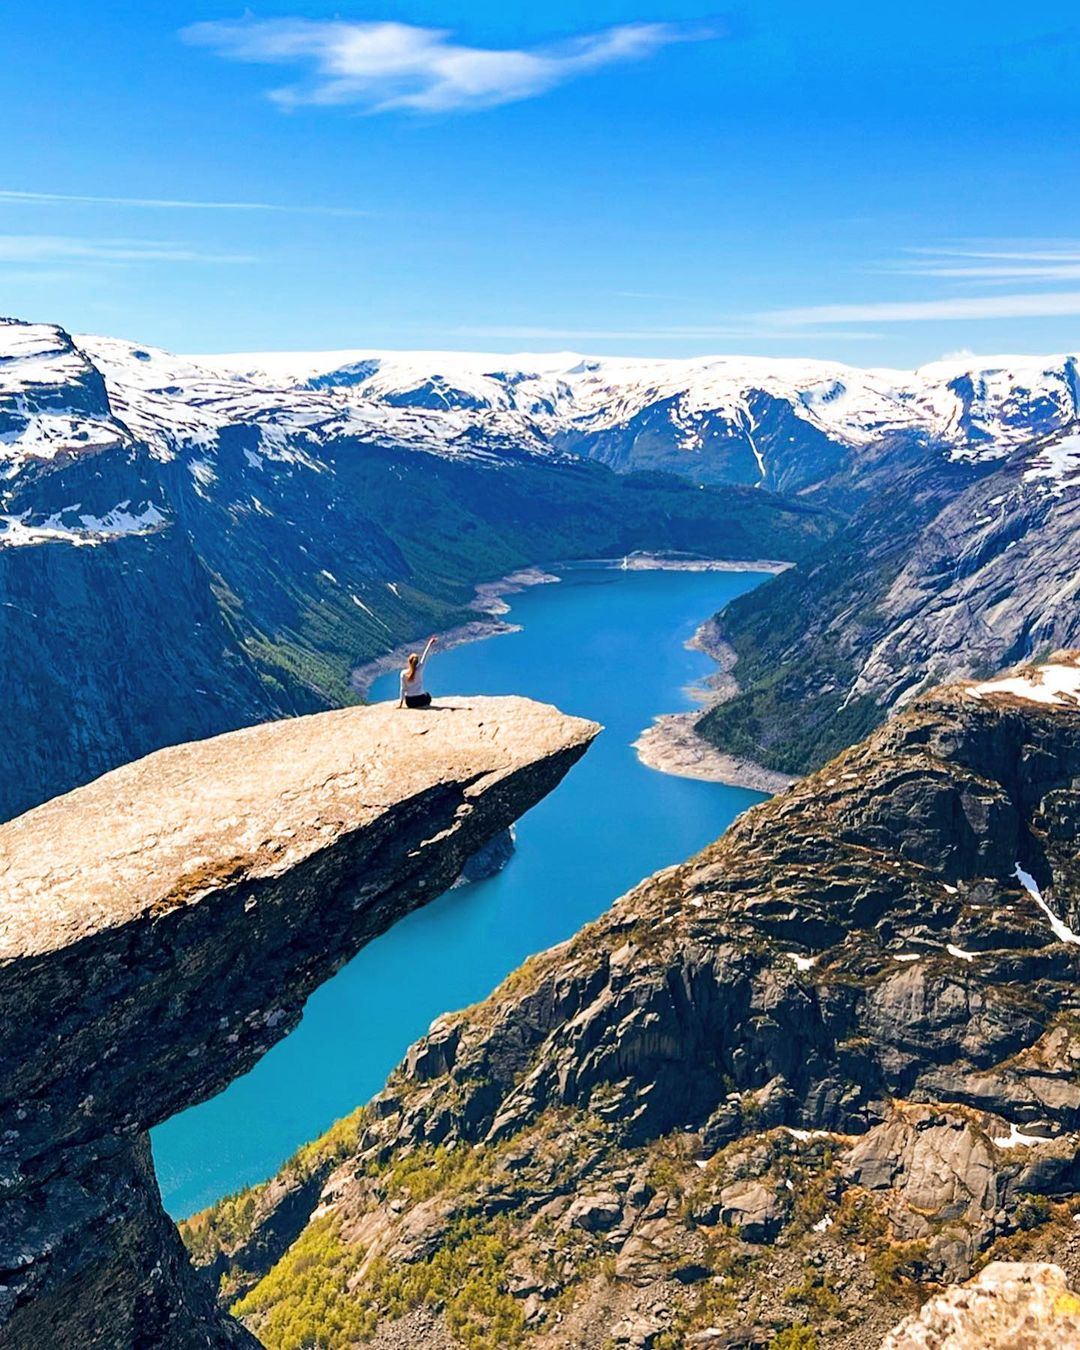
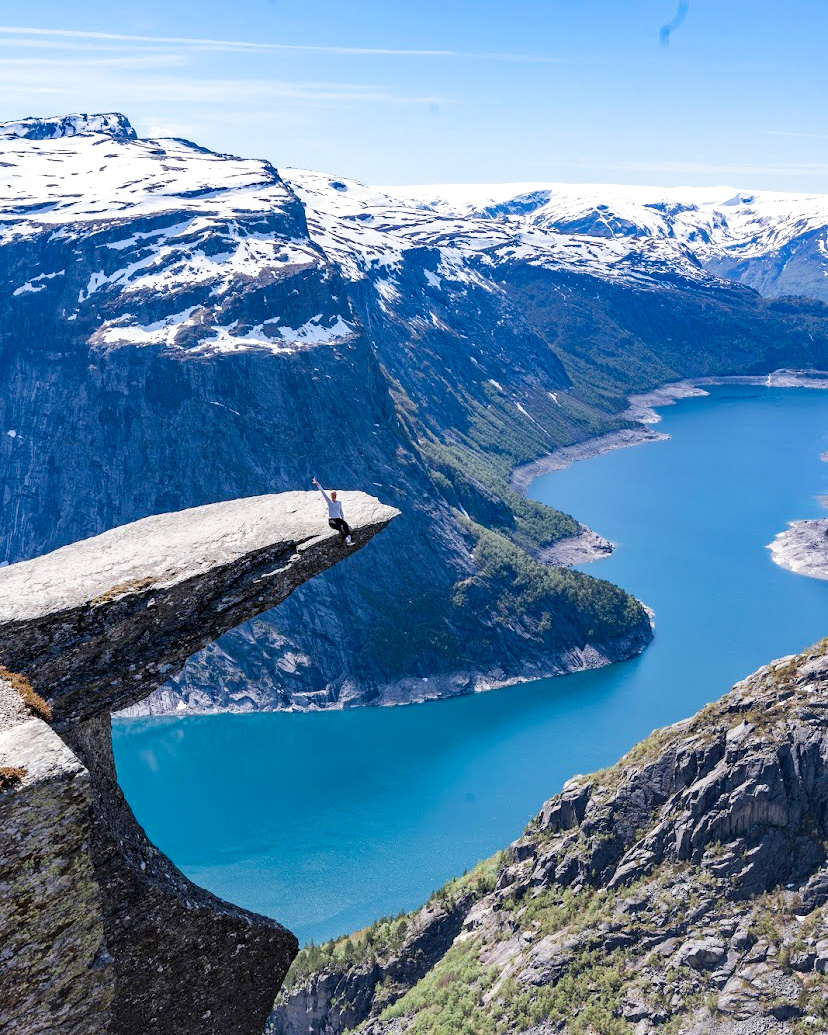
How easy is it to get photos at Trolltunga?
Getting photos at Trolltunga is easy – it’s just a long process. We arrived at the top at 12pm on a Saturday in June on a bright, clear day – which is arguably going to be the busiest time at the view point so hopefully any other time that you are looking to visit will not be so busy. Due to the number of people at the top getting photos (and a lot were taking a long time to do so) we waited for 3 hours before we were able to run out and get our shots on the rock. Thankfully a guide turned up and started pushing the people in front of us to move quicker (which was a God send) and had he been there earlier it’s likely that we would’ve only had to wait 1.5 hours to get the photos.
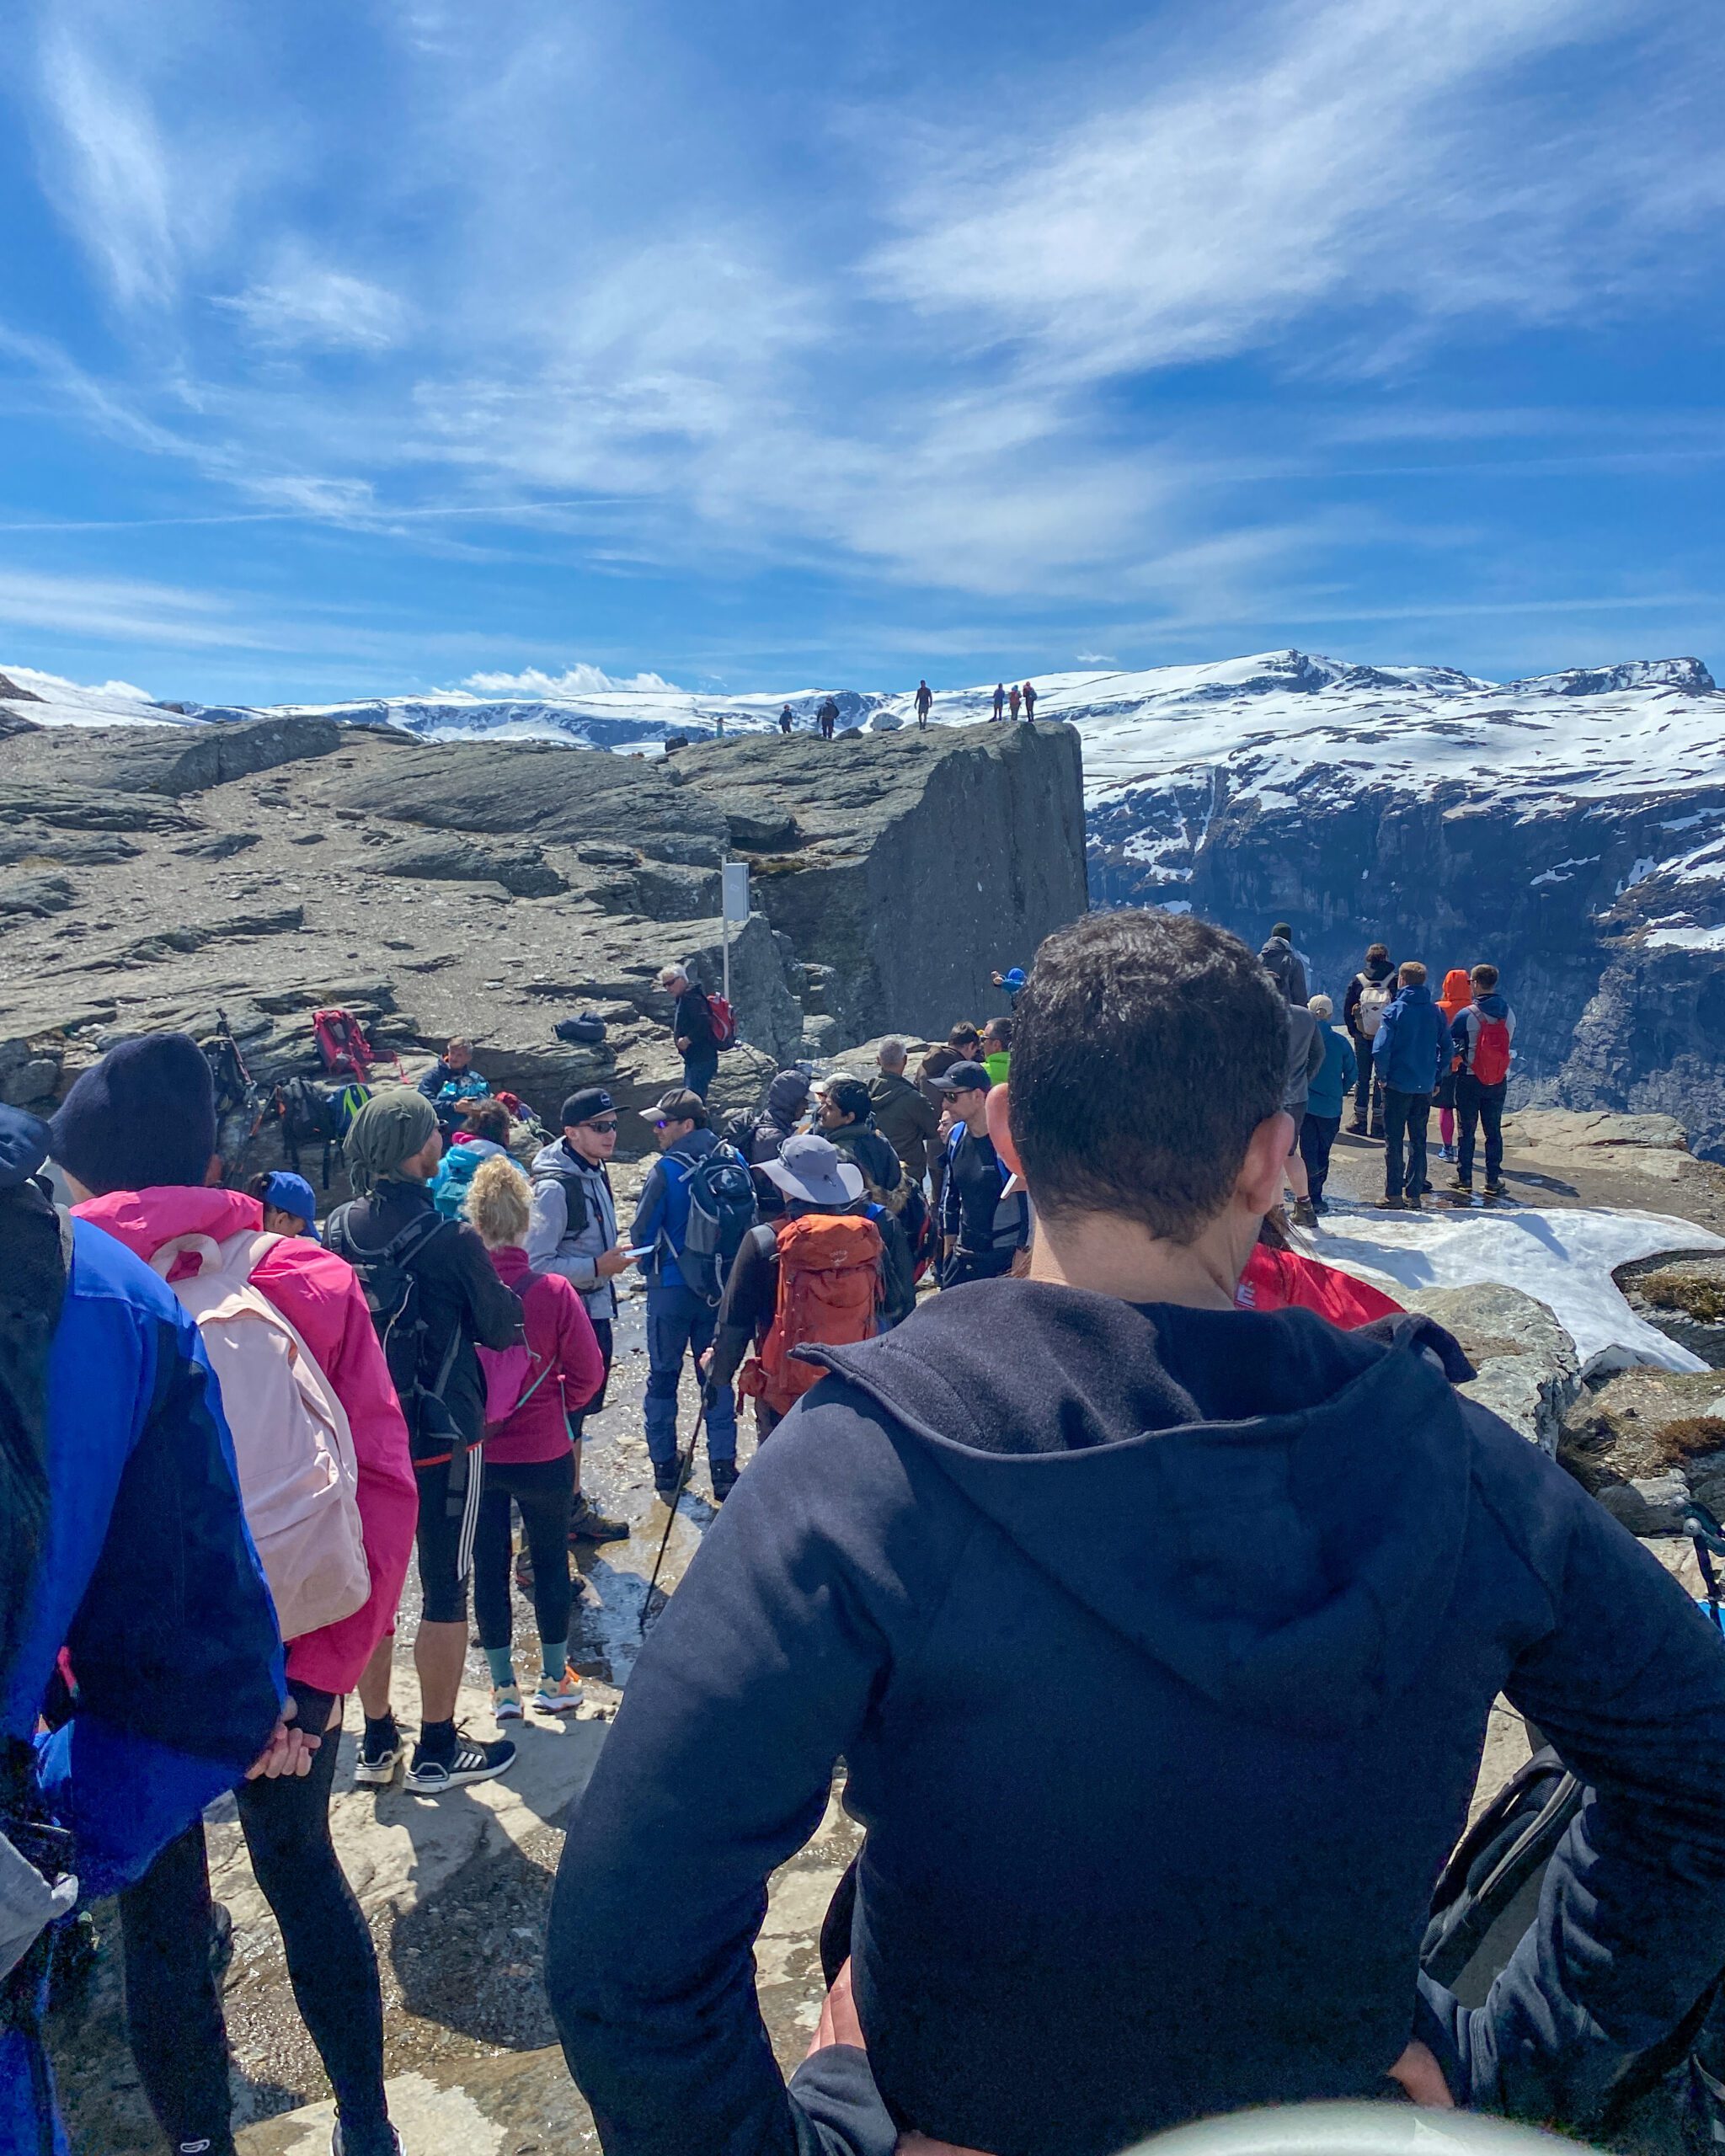
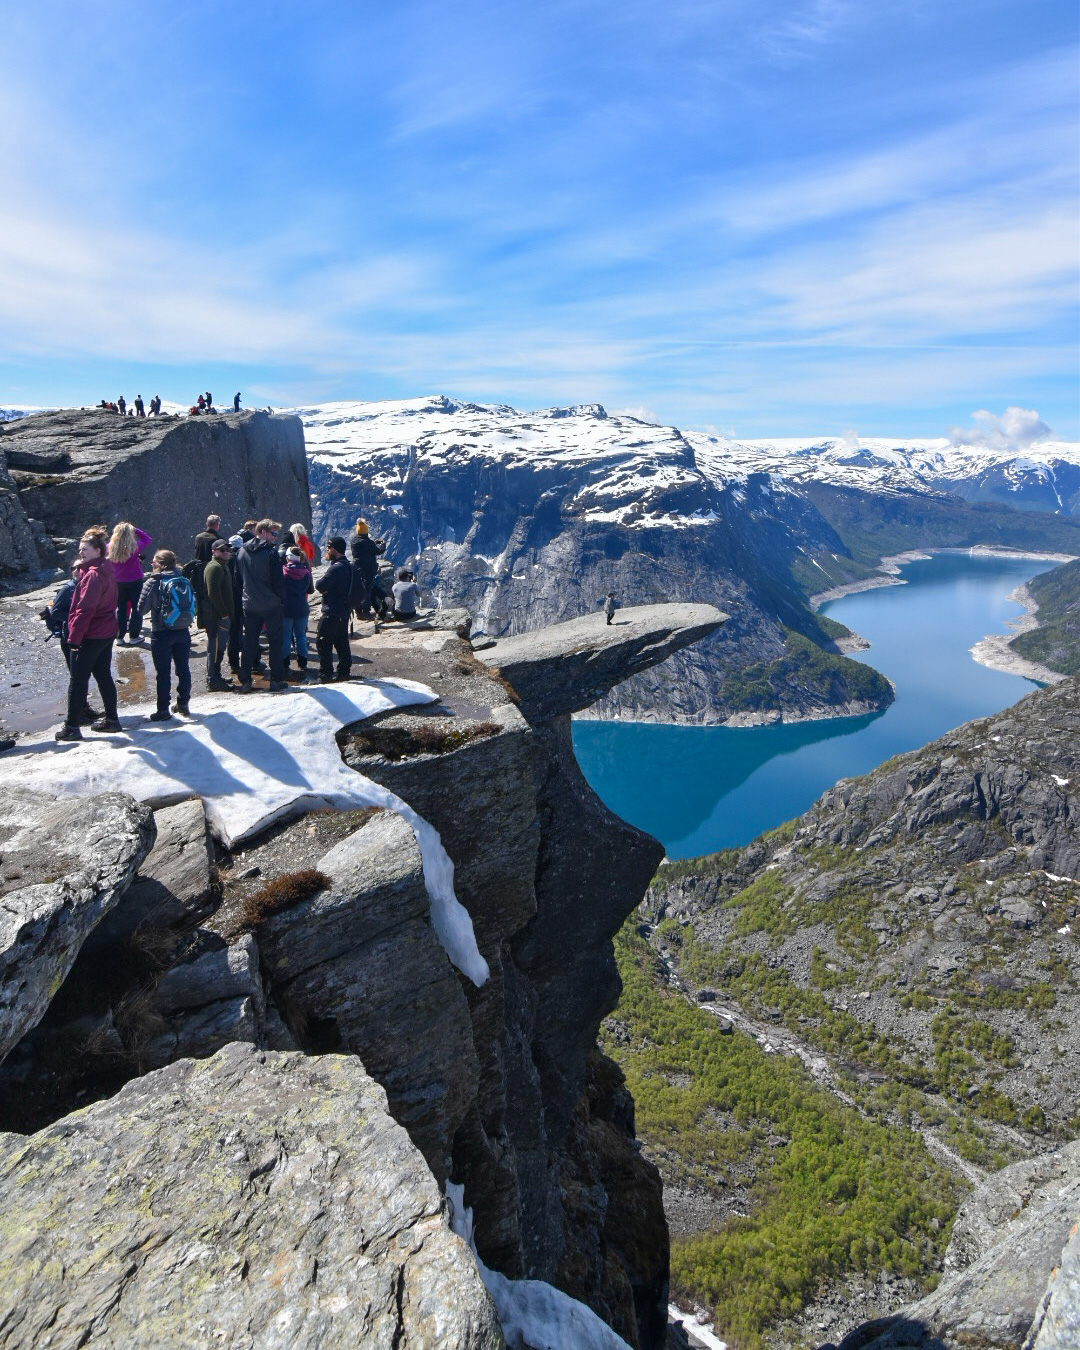
In terms of getting the actual shot at Trolltunga, we found there were a few great viewpoints – one was where everyone was lining up to get photos (first photo spot in photos below) and one was slightly more to the right (second photo spot in photos below), which showed off the height and scenery surrounding Trolltunga more. Given we had a number of people in our group, we had one person poised with a phone at the first spot and another person poised with a camera at the second spot. We swapped people half way through so that no one missed out on photos at Trolltunga (and so that we moved quickly for the line of people waiting behind us) but there are more than enough people waiting around that will be happy to take your picture as you run out onto the rock, which is one good thing about not having the place to yourself!
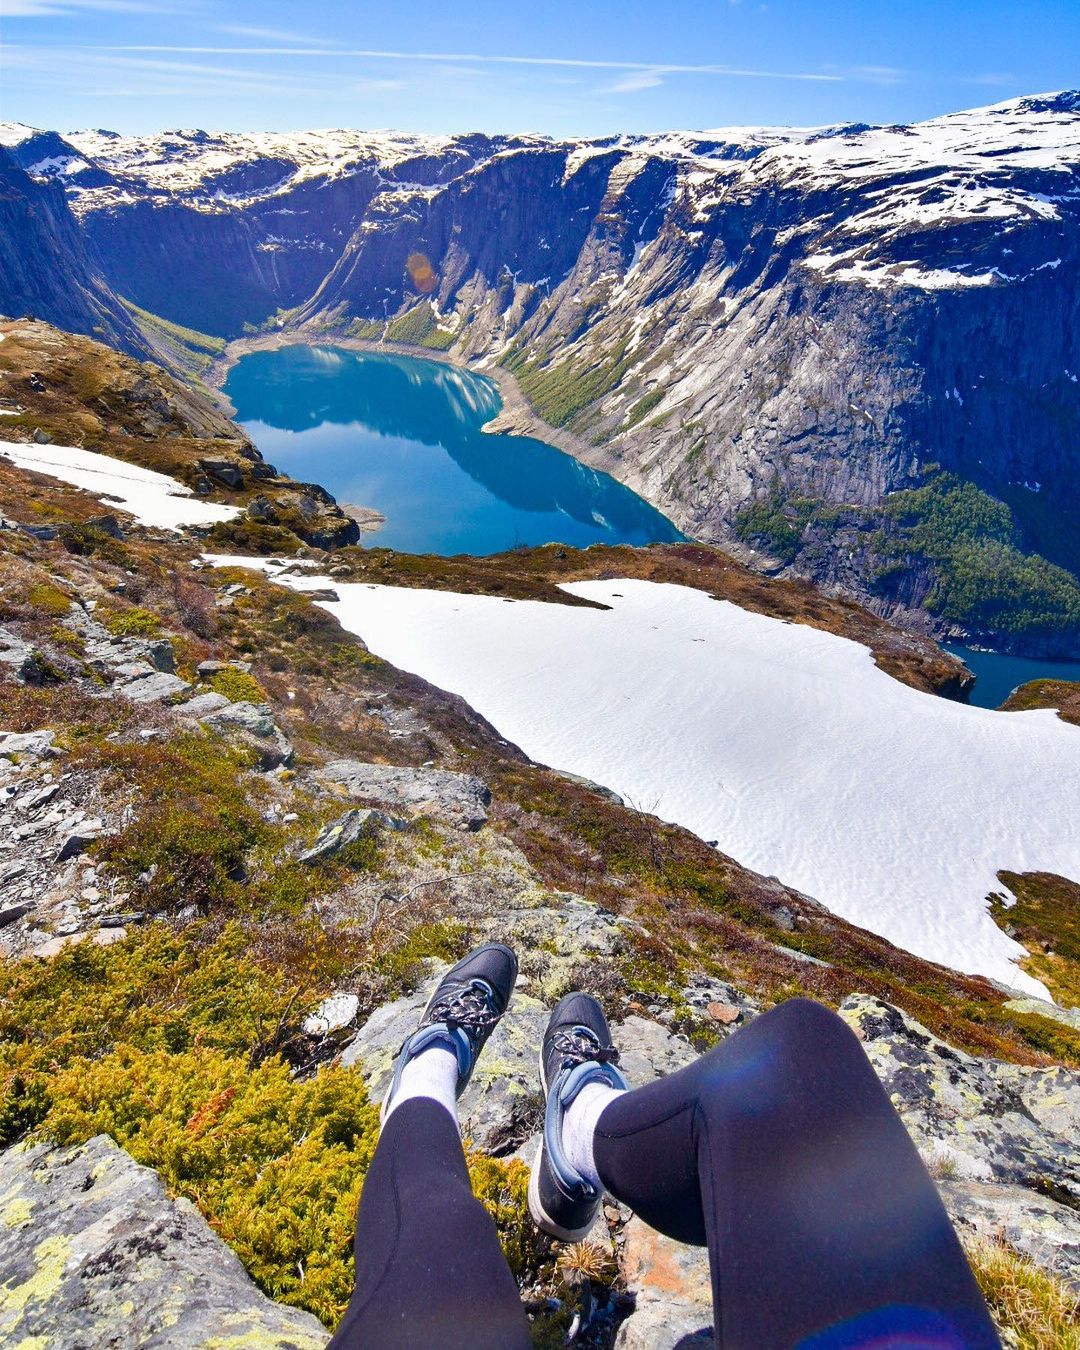
A different photo spot at the top
While the line for photos at Trolltunga is for photos on the actual rock (understandable) you can also get great shots overlooking Lake Ringedalsvatnet and the scenery from just beside the Trolltunga rock (on the other side from where people line up) so be sure to snap some while you are here.

Do I need a guide in the summer?
Whether you need a guide or not for Trolltunga does come down to personal preference. In my opinion, after completing the Trolltunga hike in 90% snow on a sunny day with no wind, I would tell any of my friends who have hiked before that they don’t need a guide as I don’t believe the hike calls for one. However, if you want to stay up overnight (a few guided tours have overnight camping options available) or you are travelling solo and want companions, a guided tour could be an option for you. I do believe you can camp up at Trolltunga without being on a guided tour – so again, it comes down to your personal preference. One thing I will warn is that when we were at the top of Trolltunga I heard a guide tell their group that if the line was too long they wouldn’t be stopping to get photos on the actual rock – I don’t know what company this guide was from but I thought that was quite a poor experience to have so if you do decide to get a guide just be sure that being able to wait for the photo on the rock is included in what you’re paying for.
Please note that outside of the summer season (June 1 to August 31) a guide is mandatory to hike Trolltunga. Please also note that the above is my opinion based on my experience and is not specific advice or instruction.
Staying overnight at Trolltunga
Like I mentioned above, staying overnight at Trolltunga is an option – and while it is often considered a way to enjoy the rock without the crowds, due to Trolltunga’s increased popularity, we saw a lot (I would estimate at least 40 people) heading up the hill to camp overnight at Trolltunga on our way back down. While you will definitely experience less people at the top if you stay overnight versus if you visit in the day, be prepared that the Trolltunga overnight experience is still a popular one also. Unfortunately, we didn’t experienced this part ourselves.
Is Trolltunga worth it?
Um, yes! Trolltunga is more than worth it. While it can be a long day in the sun and you have to be reasonably fit (or able to walk for the whole day) to conquer the hike, it is a bucket list destination for so many and an iconic hike across the world. I’ll be telling everyone I know that Trolltunga is the ultimate Norway adventure.
Please note, the information provided here is based on my opinion after my experience hiking Trolltunga and any information on the Trolltunga hike should always be taken and checked with official sources such as the Trolltunga Official Website and the Visit Norway official website.
If you are interested in Trolltunga: How to conquer the ultimate Norway hike, you may also be interested in:
- Things to do in Copenhagen
- 12 places in Iceland that you must visit
- Things to do on an Iceland stopover
- The best things to do in Stockholm, Sweden
- Things to do in London
- How to do a Paris stopover: One day in Paris
- 3 must do things in Lauterbrunnen, Switzerland
- The best photo spots in Luxembourg City: Beautiful places to photograph in Luxembourg